No Bake Cherry Cheesecake
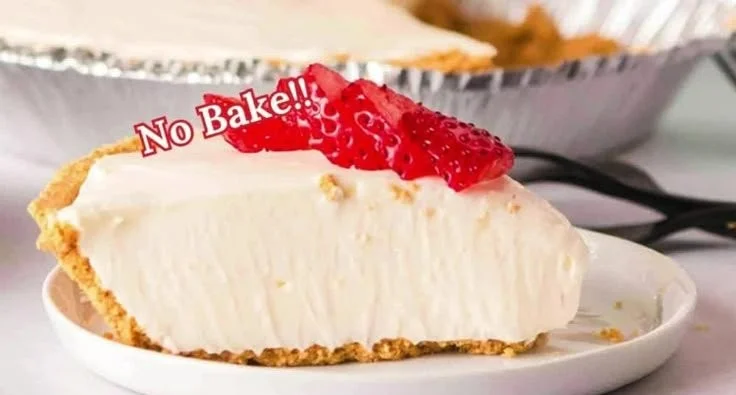
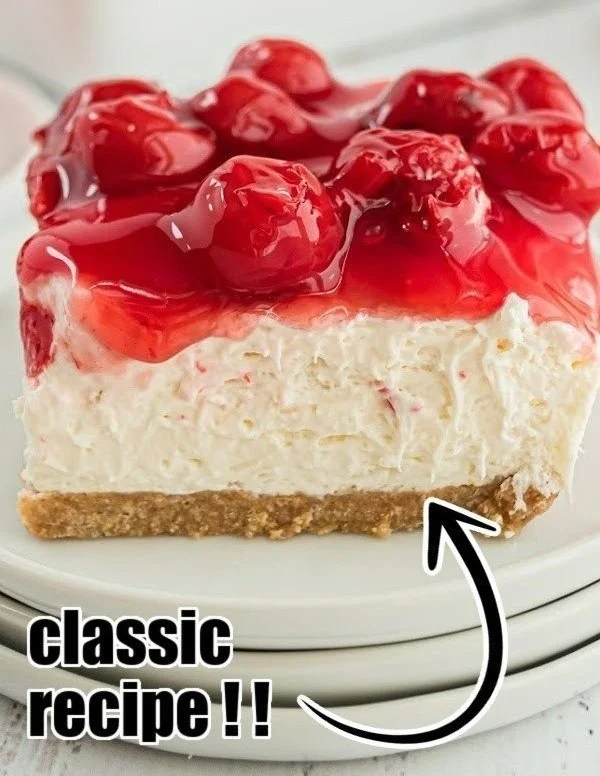
There are few things that deliver comfort and celebration at once like a perfectly creamy, no-bake cherry cheesecake. Imagine slicing into a velvety pale filling that gives a gentle, pillowy resistance to the fork; the tang of cream cheese rounds into the soft sweetness of whipped cream; and a glossy crown of ruby cherries glistens on top, releasing a fragrant, slightly tart perfume that lifts the whole dessert. The scent alone—buttery graham crust, lemon zest, and warm cherry syrup—can make the room feel like a friendly kitchen on holiday.
This is the kind of dessert that calms nerves and sparks smiles. It’s ideal for last-minute gatherings, potlucks, or when you want an elegant dessert without turning on the oven. Make it for summer barbecues to highlight bright cherries, for cozy winter holidays when a make-ahead dessert frees you up to socialize, or for a simple weekend treat that feels indulgent but effortless.
At a Glance
- Prep Time: 20 minutes active (plus chilling)
- Cook Time: 0 minutes (no baking required)
- Total Time: 4–6 hours (including chill time; overnight recommended)
- Servings: 8 (8 generous slices)
- Difficulty Level: Easy — beginner-friendly with a few chilling requirements
Nutrition Highlights
Estimated nutrition per serving (1 of 8 slices). These are calculated from ingredient totals and USDA FoodData Central averages; actual values may vary based on brands and substitutions. For general health guidance, refer to sources such as the CDC and Mayo Clinic.
- Calories: ~570 kcal
- Protein: ~5.8 g
- Carbohydrates: ~45.5 g
- Fat: ~41 g
- Saturated Fat: relatively high (from cream cheese, butter, heavy cream)
- Sugar: ~28 g
- Fiber: ~1–2 g
- Sodium: moderate (depends on salted vs. unsalted butter and cream cheese choice)
Note: This is a rich, indulgent dessert—great for occasional treats. To reduce calories or saturated fat, see the substitutions in the recipe section below. (Nutrition estimates based on USDA FoodData Central.)
Why You’ll Love It
- Effortless elegance: No oven, minimal active time, and it still looks like a showstopper.
- Crowd-pleaser: Creamy texture, bright cherry topping, and buttery crust satisfy a wide range of tastes.
- Make-ahead friendly: It improves after a few hours in the fridge—perfect for parties when you want to prep in advance.
- Nostalgic and versatile: The cherry topping evokes classic diner desserts and can trigger fond memories while allowing modern twists (single-serving jars, gluten-free crusts, or seasonal fruits).
Preparation Guide
Ingredients
- For the crust:
- 1 1/2 cups (150 g) graham cracker crumbs (about 10–12 full crackers)
- 6 tbsp (85 g) unsalted butter, melted
- 2 tbsp granulated sugar (optional, for a slightly sweeter crust)
- For the filling:
- 16 oz (450 g) full-fat cream cheese, softened
- 3/4 cup (90 g) powdered sugar, sifted (adjust to taste)
- 1 tsp pure vanilla extract
- 1 tbsp lemon juice (optional; brightens the flavor)
- 1 cup (240 ml) heavy whipping cream, cold
- For the topping:
- 1 1/2 cups (about 360–400 g) cherry pie filling or fresh cherries cooked with a little sugar and cornstarch
- Fresh whole cherries or mint leaves for garnish (optional)
Optional ingredients and substitutions
- Lighter: Use Neufchâtel or low-fat cream cheese and swap half the heavy cream for plain Greek yogurt (note: texture will be lighter and slightly tangier).
- Vegan: Use a crust made with dates + almonds or vegan graham crumbs and replace cream cheese with a cashew-based cheesecake filling and coconut cream whipped topping.
- Gluten-free: Use gluten-free graham crackers or a crust made from almond flour + a touch of coconut sugar.
- Flavor variations: Add 2 tbsp sour cream for extra tang; fold in 1–2 tbsp lemon zest for brightness.
Step-by-step instructions
- Prepare the crust:
- Combine graham cracker crumbs, melted butter, and sugar in a bowl until evenly moistened and crumbly.
- Press firmly into the bottom of a 9-inch (23 cm) springform pan or pie dish, creating an even layer. Use the bottom of a glass to compact it.
- Chill in the refrigerator while you make the filling (10–15 minutes).
- Make the filling:
- In a large bowl, beat the softened cream cheese until smooth and free of lumps (use a hand mixer or stand mixer on medium).
- Add powdered sugar, vanilla extract, and lemon juice; beat until combined and smooth.
- In a separate chilled bowl, whip the heavy cream to medium-stiff peaks.
- Gently fold the whipped cream into the sweetened cream cheese in 2 additions. Use a spatula and fold until homogeneous—do not overmix or the mixture can deflate.
- Assemble:
- Spoon the filling over the chilled crust and smooth the top with an offset spatula.
- Refrigerate for at least 4 hours, ideally overnight, to let the filling firm up.
- Add topping:
- Before serving, spoon the cherry pie filling evenly over the cheesecake, or arrange fresh/compote cherries on top.
- Garnish with whole cherries, lemon zest, or mint leaves if desired.
- Serve:
- Run a sharp knife under hot water and wipe dry between slices to get clean cuts.
- Slice and enjoy.
Practical tips:
- Make sure cream cheese is at room temperature for a lump-free filling.
- Chill the mixing bowl and whisk for the whipped cream for better volume.
- Don’t overfold whipped cream—stop when streaks disappear.
- If your crust is too crumbly, add a little more melted butter; if too oily, add more crumbs.
Serving Suggestions
- Classic: Serve plain slices with a spoonful of cherry topping and a dusting of powdered sugar.
- With coffee or tea: Pairs beautifully with a robust coffee or a floral black tea to cut through the richness.
- Mini portions: Press crust into muffin tins lined with parchment and layer filling for individual servings—great for parties.
- Extra indulgence: Add a drizzle of dark chocolate or a dollop of caramel sauce for special occasions.
- Lighter plate: Serve with a side of fresh berries and a small mint garnish to add freshness and color.
Shelf Life & Storage
- Room temperature: Not recommended. Dairy-based cheesecakes should not sit out more than 2 hours.
- Refrigeration: Store covered with plastic wrap or in an airtight container for up to 4 days. For best texture, consume within 2–3 days.
- Freezer: Cheesecake freezes well. Wrap tightly (plastic wrap + foil) and freeze for up to 2 months. Thaw overnight in the refrigerator before serving. Note: The texture of the cherry topping may change slightly after freezing; consider storing topping separately when possible.
Expert Tips
- Use full-fat dairy for the creamiest, most stable texture—low-fat versions frequently make the filling runny or grainy.
- For the cleanest slices, chill thoroughly and dip your knife in hot water between cuts.
- If using fresh cherries: macerate them with 1–2 tbsp sugar and a squeeze of lemon for 30 minutes, then simmer with a teaspoon of cornstarch dissolved in water to thicken into a glossy topping.
- Want a firmer set without gelatin? Add 2 tsp unflavored gelatin (bloomed in 2 tbsp cold water and warmed) to the cream cheese mixture—this helps for high-moisture or warm environments.
- To avoid a soggy crust, press it firmly and chill before adding the filling; for an ultra-barrier, briefly brush the cooled crust with 1 egg white brushed and baked for a minute—(this step requires baking, so it changes the fully no-bake nature).
Creative Twists
- Vegan Cherry Cheesecake: Soak 2 cups cashews overnight, blend with 1/2 cup coconut cream, maple syrup, lemon juice, and vanilla until silky. Use a date-almond crust and top with cherry compote.
- Chocolate-Cherry Swirl: Fold 1/3 cup melted and cooled dark chocolate into half the filling and layer, swirling chocolate through the plain filling with a knife before chilling.
- Lighter Greek-Style: Replace half the cream cheese with full-fat Greek yogurt and reduce powdered sugar to 1/2 cup for tang and lower calories (texture will be slightly less dense).
- Nutty Almond Crust: Substitute graham crumbs with finely ground almonds + a touch of coconut flour for a gluten-free, fragrant base.
Common Questions & Answers
Q: Can I make this ahead of time?
A: Yes—make the cheesecake up to 3 days ahead (without fresh garnishes) and add the cherry topping just before serving for the best texture.
Q: My filling looks grainy—what happened?
A: Graininess usually comes from cold cream cheese or overbeating. Make sure the cream cheese is fully softened and beat until smooth before adding other ingredients.
Q: Can I use frozen cherries for the topping?
A: Yes. Thaw and simmer with a little sugar and cornstarch to restore the glossy, thickened topping before spooning over the cake.
Q: How can I make it lower in calories?
A: Try low-fat cream cheese or a Neufchâtel/Greek yogurt combination, reduce sugar, and use a thin crust (or substitute a nut-and-date crust for less refined sugar). Expect some texture differences.
Conclusion
No-bake cherry cheesecake is an uncomplicated, crowd-pleasing dessert that combines silky texture, bright fruit, and buttery crunch—perfect for holidays, potlucks, or quiet indulgent evenings. If you want additional step-by-step photos or alternative takes on no-bake cheesecakes, consider this well-loved quick berry cheesecake inspiration from Plowing Through Life’s ten-minute berry cheesecake recipe, or this detailed cherry-focused version with helpful tips from Upstate Ramblings’ no-bake cherry cheesecake guide. Try the recipe, adapt it to your pantry, and share your photos and tweaks—I’d love to hear how your cheesecake turned out.
Print
No Bake Cherry Cheesecake
- Total Time: 240 minutes
- Yield: 8 servings 1x
- Diet: Vegetarian
Description
A rich and creamy no-bake cherry cheesecake topped with sweet cherry pie filling, perfect for any occasion.
Ingredients
- 1 1/2 cups (150 g) graham cracker crumbs
- 6 tbsp (85 g) unsalted butter, melted
- 2 tbsp granulated sugar (optional)
- 16 oz (450 g) full-fat cream cheese, softened
- 3/4 cup (90 g) powdered sugar, sifted
- 1 tsp pure vanilla extract
- 1 tbsp lemon juice (optional)
- 1 cup (240 ml) heavy whipping cream, cold
- 1 1/2 cups cherry pie filling or fresh cherries
- Fresh whole cherries or mint leaves for garnish (optional)
Instructions
- Combine graham cracker crumbs, melted butter, and sugar in a bowl until evenly moistened.
- Press the mixture into the bottom of a springform pan or pie dish and chill for 10–15 minutes.
- In a bowl, beat the softened cream cheese until smooth.
- Add powdered sugar, vanilla extract, and lemon juice; mix until smooth.
- In a separate bowl, whip the heavy cream to medium-stiff peaks.
- Fold the whipped cream into the cream cheese mixture gently.
- Spoon the filling over the chilled crust and smooth the top.
- Refrigerate for at least 4 hours, ideally overnight.
- Before serving, spoon cherry pie filling over the cheesecake and garnish.
- Slice and enjoy!
Notes
Make sure the cream cheese is at room temperature for a lump-free filling. Chill bowls for whipping cream for better volume.
- Prep Time: 20 minutes
- Cook Time: 0 minutes
- Category: Dessert
- Method: No-Bake
- Cuisine: American
Nutrition
- Serving Size: 1 slice
- Calories: 570
- Sugar: 28g
- Sodium: 400mg
- Fat: 41g
- Saturated Fat: 25g
- Unsaturated Fat: 10g
- Trans Fat: 0g
- Carbohydrates: 45g
- Fiber: 2g
- Protein: 5.8g
- Cholesterol: 150mg
Printable Recipe Card
Want just the essential recipe details without scrolling through the article? Get our printable recipe card with just the ingredients and instructions.