Gluten Free Chocolate Crinkle Cookies (Dairy Free, Too!)
There is something almost cinematic about a tray of warm chocolate crinkle cookies: the scent of cocoa drifting through the kitchen, the satin-dark cracks in a powdered-sugar coat, the first bite that yields a fudgy center and a slightly crisp edge. These cookies feel like an embrace — nostalgic, comforting, and a little decadent — without the dairy or gluten that can make holiday baking complicated for some guests. Whether you’re hiding a tin for late-night snacking, serving them at a winter party, or packing a bright, chewy treat with your afternoon coffee, these crinkles deliver big flavor with a simple, reliable method.
Perfect for cozy mornings with a steaming mug, festive cookie swaps, or anytime you want a quick showstopper that’s allergy-friendly, these cookies are forgiving, fast to assemble (with a required chill), and wildly satisfying. Read on for the full recipe, nutrition notes, expert tips, and creative ways to make them your own.
At a Glance
- Prep Time: 15 minutes (plus 3–12 hours chilling)
- Cook Time: 8–10 minutes per batch
- Total Time: 3 hours 25 minutes (including minimum 3-hour chill) — overnight chilling recommended
- Servings: Makes about 24 cookies (1 cookie per serving; adjust as desired)
- Difficulty Level: Easy–Moderate (the chilling step is essential for success)
Nutrition Highlights
Nutrition estimates are approximate and were calculated using USDA FoodData Central nutrient values and standard food composition references. Values reflect one cookie, assuming this batch yields 24 cookies. If you make larger/smaller cookies, divide totals accordingly.
Estimated nutrition per cookie (1 of 24)
- Calories: ~182 kcal
- Protein: ~2.5 g
- Total Carbohydrates: ~26.5 g
- Dietary Fiber: ~1.7 g
- Sugars: ~17.5 g
- Total Fat: ~8.5 g
- Saturated Fat: ~2.5 g (from eggs and cocoa; avocado oil is mostly unsaturated)
- Sodium: ~50 mg
Notes on these numbers
- These are estimates intended for guidance only. Calculations used ingredient weights and nutrient data from USDA FoodData Central. For clinical dietary advice (daily targets, medical conditions), consult resources such as the CDC or Mayo Clinic or speak with a registered dietitian.
- These cookies are gluten-free and dairy-free as written, but they are not low-sugar or low-calorie — they are a sweet treat to enjoy in moderation.
Why You’ll Love It
- Irresistible texture and aroma: The dough produces a crackled, powdered-sugar exterior and a fudgy, almost brownie-like interior. The smell of Dutch-processed cocoa mingled with warm vanilla is immediately comforting.
- Inclusive baking: Dairy-free and gluten-free by design, these cookies make it easy to include guests with common dietary restrictions without compromising flavor.
- Reliable and impressive: Simple pantry ingredients (plus a mandatory chill) deliver a professional-looking cookie with minimal fuss — perfect for cookie swaps or last-minute entertaining.
- Memory-making: These are the kind of cookies that invite nostalgia — fold them into holiday traditions, school treats, or slow Sunday baking.
How to Make Gluten Free Chocolate Crinkle Cookies (Dairy Free, Too!)
Ingredients
- 3/4 cup avocado oil (can sub another neutral-tasting oil, like vegetable oil or canola oil)
- 1 cup unsweetened Dutch-processed cocoa powder (96 grams)
- 1 1/2 cups cane sugar (300 grams)
- 4 large eggs
- 2 teaspoons vanilla extract
- 1/2 teaspoon salt
- 2 teaspoons baking powder
- 1 3/4 cups gluten free measure-for-measure flour * (210 grams)
- 1 cup powdered sugar (or more, if needed) (120 grams)
Optional ingredients & substitutions
- Oil swap: Replace avocado oil with light olive oil, vegetable oil, or canola oil. Do not use extra-virgin olive oil (flavor too strong).
- To make vegan: Replace each large egg with 1/4 cup aquafaba (whipped) or a flax egg (1 tbsp ground flax + 3 tbsp water per egg). Note: texture will be slightly different; see Variations for details.
- Sweetener swaps: Use coconut sugar for part of the cane sugar for a deeper flavor, but color and spread may change.
- Add-ins: 1/2 cup dairy-free chocolate chips, 1/3 cup chopped walnuts, or a pinch of espresso powder to deepen chocolate flavor.
Method — Step-by-step
- Combine. In a large bowl (or a stand mixer fitted with the paddle), combine the avocado oil, Dutch-processed cocoa powder, and cane sugar. Stir until well-combined — the mixture will look like very dark wet sand.
- Add eggs. Add the eggs one at a time, mixing briefly between each addition so the batter becomes smooth and glossy.
- Flavor. Add the vanilla extract and stir to combine.
- Dry ingredients. Add the salt, baking powder, and gluten-free flour. Stir until just combined; avoid overmixing to keep cookies tender.
- Chill the dough. Cover the bowl and chill the dough for 3–4 hours (or overnight). Do NOT skip this step — chilling firms the fat and prevents excessive spreading in the oven.
- Preheat & prep. When ready to bake, preheat oven to 350°F (175°C). Line a baking sheet with parchment and place the powdered sugar in a shallow bowl.
- Scoop & roll. Use a small cookie scoop or a tablespoon to form roughly 1-inch balls of chilled dough. Roll each ball in powdered sugar until well coated.
- Arrange for baking. Place 8–12 coated cookie dough balls on the prepared baking sheet, leaving ~2 inches between each.
- Bake. Bake at 350°F for 8–10 minutes, or until the edges are just set and the centers still look slightly wet. The exterior should be crackled and matt.
- Cool. Allow the cookies to cool on the baking sheet for 2–3 minutes to continue setting, then transfer to a cooling rack to cool completely.
- Repeat. Bake remaining dough in batches.
- Serve & store. Enjoy right away, or store in an airtight container at room temperature for 2–3 days. Freeze for up to 2–3 months (see Storage for details).
Practical tips
- Don’t skip chilling; warm dough spreads into thin, flat cookies.
- Use Dutch-processed cocoa for deeper flavor and better melt contrast; you may need slightly less sugar with very intense cocoa.
- Slight underbake for fudgier centers — they’ll finish setting off the heat of the baking sheet.
- If powdered sugar is absorbed too quickly, roll a second time right before baking for brighter contrast.
Best Pairings
- Classic: A tall cup of black coffee or cold oat milk balances the intense chocolate.
- Cozy: Serve warm with a scoop of dairy-free vanilla ice cream (for an ice cream sandwich), or alongside spiced chai.
- Elegant: Plate with a dusting of extra cocoa and sea salt flakes for a refined touch at a dessert buffet.
- Gift-ready: Package in a parchment-lined tin with a ribbon for an easy, crowd-pleasing edible gift.
How to Store
- Room temperature: Store in an airtight container at room temperature for 2–3 days. Place a piece of parchment between layers to prevent sticking.
- Refrigeration: Not necessary. If you prefer chilled cookies, refrigerate for up to 1 week in an airtight container — note that refrigeration can firm fats and change texture.
- Freezer: Freeze baked cookies in a single layer on a tray until firm (about 1 hour), then transfer to a freezer-safe bag or container. Stored properly, cookies will keep 2–3 months. Thaw at room temperature for 20–30 minutes before serving.
Pro Tips & Tricks
- Flour choice matters: Use a reliable gluten-free measure-for-measure flour blend that contains xanthan gum or another binder. Flours without binders can produce crumbly cookies.
- Cocoa warmth: Warm the bowl slightly before scooping if your dough is too firm from chilling — you want scoopable, not rock-hard.
- Don’t overfold the powdered sugar: If you double-coat in powdered sugar, do the second roll immediately before baking to preserve the cracked look.
- Bake test: Bake one sheet first to dial in your oven and cookie sizing — oven temps and cookie sizes can change the required bake time by a minute or two.
- Texture cues: Edges set and centers still glossy = ready. Centers will finish setting as cookies cool.
Creative Twists
- Vegan version: Substitute 4 flax eggs (4 tbsp ground flax + 12 tbsp water, rested 10 minutes) or 1 cup aquafaba for the eggs and add 2 Tbsp additional cocoa if you want extra fudginess. Expect slightly cake-like centers.
- Orange-chocolate: Add 1 teaspoon orange zest to the batter and replace 1 tbsp of sugar with a tablespoon of orange liqueur or orange juice for brightness.
- Peppermint holiday crinkles: Add 1/2 tsp peppermint extract and swap half the powdered sugar for crushed candy canes on top post-bake.
- Espresso kick: Add 1–2 teaspoons instant espresso powder into the wet ingredients to intensify the chocolate flavor.
- Nutty crunch: Fold in 1/2 cup toasted chopped hazelnuts or walnuts for texture contrast.
Frequently Asked Questions
Q: Can I make these without eggs?
A: Yes — flax eggs or aquafaba can work, but texture will change slightly. Flax eggs often produce a denser crumb; aquafaba gives a lighter lift but requires whipping for best results.
Q: My cookies spread into flat discs. What went wrong?
A: Most likely the dough was not chilled long enough, or your oven is warmer than stated. Firm the dough in the fridge for at least 3–4 hours or overnight, and check that your baking powder is fresh.
Q: Can I use regular cocoa instead of Dutch-processed?
A: You can, but the flavor will be slightly brighter and more acidic. You may also notice less crackle contrast. If using natural cocoa, slightly reduce the baking powder to avoid over-rising.
Q: How can I make them less sweet?
A: Reduce the granulated sugar by 1/4 cup (50g) and taste the dough; be cautious — sugar affects texture and spread. Darker cocoa (higher percentage) can help offset perceived sweetness.
Q: Can I freeze the dough?
A: Yes — scoop dough balls, freeze solid on a tray, then transfer to a bag. Bake from frozen; add 1–2 minutes to the baking time and roll quickly in powdered sugar before baking (frozen dough may not hold powdered sugar well unless rolled right before oven).
Conclusion
These gluten-free, dairy-free chocolate crinkle cookies are a simple way to bring big chocolate flavor to any table — reliable, inclusive, and delightfully chewy. If you’d like additional technique ideas or a fully vegan version to compare, check out this take on the recipe at Gluten-Free Chocolate Crinkle Cookies (Dairy-Free!) and this vegan variation for alternative egg-free substitutions at Gluten-Free Vegan Chocolate Crinkle Cookies – Delightful Adventures. Try the recipe, swap in a variation, and share your photos or questions — I’d love to hear how your tin turns out!
Print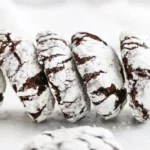
Gluten Free Chocolate Crinkle Cookies
- Total Time: 205 minutes
- Yield: 24 cookies 1x
- Diet: Gluten-Free, Dairy-Free
Description
Decadent gluten-free and dairy-free chocolate crinkle cookies with a fudgy center and a crackled powdered-sugar coating.
Ingredients
- 3/4 cup avocado oil (or another neutral oil)
- 1 cup unsweetened Dutch-processed cocoa powder
- 1 1/2 cups cane sugar
- 4 large eggs
- 2 teaspoons vanilla extract
- 1/2 teaspoon salt
- 2 teaspoons baking powder
- 1 3/4 cups gluten free measure-for-measure flour
- 1 cup powdered sugar (or more, if needed)
Instructions
- In a large bowl, combine the avocado oil, cocoa powder, and cane sugar until well-combined.
- Add the eggs one at a time, mixing briefly after each addition.
- Add the vanilla extract and stir to combine.
- Add the salt, baking powder, and gluten-free flour, stirring until just combined.
- Cover the bowl and chill the dough for 3–4 hours (or overnight).
- Preheat oven to 350°F (175°C) and line a baking sheet with parchment.
- Form dough into 1-inch balls and roll in powdered sugar.
- Place dough balls on the prepared baking sheet, leaving about 2 inches apart.
- Bake for 8–10 minutes, allowing cookies to cool on the baking sheet for 2–3 minutes before transferring to a cooling rack.
- Store in an airtight container at room temperature or freeze for up to 2–3 months.
Notes
These cookies are gluten-free and dairy-free. Do not skip the chilling step for the best results.
- Prep Time: 15 minutes
- Cook Time: 10 minutes
- Category: Dessert
- Method: Baking
- Cuisine: American
Nutrition
- Serving Size: 1 cookie
- Calories: 182
- Sugar: 17.5g
- Sodium: 50mg
- Fat: 8.5g
- Saturated Fat: 2.5g
- Unsaturated Fat: 6g
- Trans Fat: 0g
- Carbohydrates: 26.5g
- Fiber: 1.7g
- Protein: 2.5g
- Cholesterol: 0mg