Chocolate Rice Krispie Balls
Introduction
Close your eyes and imagine warm, glossy chocolate melting into a gentle peanut-butter aroma, the crisp snap of toasted cereal giving way to a pillowy, chewy center. These Chocolate Rice Krispie Balls hit that perfect sweet spot between candy and comfort food: a crunch that dissolves into creamy, chocolate-peanut butter goodness. They’re the kind of treat that invites sharing—hand them around at a holiday party, tuck them into lunchboxes, or keep a small stash for late-night movie cravings.
If you enjoy playful spins on cereal confections, you might also like this take on banana Rice Krispie treats, which swaps in fresh fruit for a softer, fruit-forward bite.
At a Glance
- Prep Time: 15 minutes
- Cook Time (melting & assembly): 10 minutes
- Total Time: 25 minutes
- Servings: About 12 balls (makes 12 generous bites)
- Difficulty Level: Easy — no baking required
Nutritional Breakdown
Nutrition per serving (1 ball). These are estimates calculated from standard ingredient data (USDA FoodData Central) and rounded to practical values; exact numbers depend on brands and precise measures.
- Calories: ~270 kcal
- Protein: ~4 g
- Carbohydrates: ~28 g
- Sugars (mostly from honey and chocolate): ~20–22 g
- Fiber: ~1 g
- Fat: ~17 g
- Saturated fat: ~7–8 g
- Sodium: ~110–150 mg (varies with peanut butter and chocolate)
Note: Values are approximate. For reference on added-sugar recommendations and how these treats fit into a balanced diet, consult sources such as the Mayo Clinic and USDA guidance; keep portion sizes in mind if you’re monitoring calories or sugar intake.
Why You’ll Love It
- Pure comfort with a nostalgic crunch: The Rice Krispies add the delicate, airy crisp that contrasts beautifully with the rich, smooth chocolate coating.
- Fast and unfussy: No oven, no specialized equipment—just a little melting and stirring. Perfect for last-minute gatherings or when you want a homemade treat without a big time commitment.
- Crowd-pleaser and portable: These hold up well in a tin or on a platter and are easy to pick up by hand—great for holiday parties, bake sales, or as an after-school snack that feels special.
- Customizable: Switch the toppings or swap ingredients (see Variations) to make them vegan, gluten-free, or nut-free.
Preparation Guide
Ingredients
- 3 cups Rice Krispies cereal
- 1/2 cup peanut butter (creamy or crunchy) — about 128 g
- 1/2 cup honey or light corn syrup (use honey for a more natural sweetness) — about 170 g
- 1 cup semi-sweet chocolate chips — about 170 g
- 1/2 cup (1 stick) butter — 113 g
- 1 teaspoon vanilla extract
- Optional toppings: sprinkles, crushed nuts, flaky sea salt, shredded coconut
Substitutions & optional ingredients
- Nut-free: use sunflower seed butter in place of peanut butter (look for a no-separation brand or stir well).
- Vegan: use vegan chocolate chips, coconut oil or vegan butter in place of butter, and agave syrup instead of honey.
- Gluten-free: Rice Krispies are typically gluten-free (check the package) or use a certified gluten-free puffed rice cereal.
- Add-ins: mini marshmallows, crushed pretzels, or a tablespoon of cocoa powder for a deeper chocolate flavor.
Step-by-step Instructions
- Prepare a tray by lining it with parchment paper or a silicone mat. Set a small cookie scoop or spoon nearby.
- In a medium saucepan over low heat, combine butter and chocolate chips. Stir constantly until melted and smooth. Remove from heat.
- Stir in peanut butter, honey (or corn syrup), and vanilla extract until the mixture is homogeneous and glossy. Work quickly while warm so the mixture stays fluid.
- In a large mixing bowl, place the Rice Krispies. Pour the chocolate–peanut butter mixture over the cereal. Gently fold with a rubber spatula—coat the cereal evenly but avoid overmixing (which can crush the crisp texture).
- Let the mixture cool for 5 minutes so it’s easier to handle but still pliable. Using damp hands or a cookie scoop, form heaping tablespoons into compact balls, pressing gently so they hold together. Place each ball on the prepared tray.
- If desired, melt a few extra chocolate chips and drizzle on top, or press a sprinkle or crushed nut onto each ball while the chocolate surface is still tacky.
- Chill the tray in the refrigerator for 20–30 minutes to set. Serve chilled or at room temperature.
Practical tips: If the mixture becomes too stiff to shape, warm it very briefly in the microwave (10–15 seconds) or over a double boiler. Avoid overheating peanut butter mixture—excess heat can make the texture greasy. For uniform sizes and a polished look, use a small cookie scoop.
For a slightly different no-bake technique and inspiration, check out this recipe for no-bake chocolate peanut butter balls.
Best Pairings
- With coffee or espresso: A bitter espresso cuts through the sweetness beautifully—great for after-dinner treats.
- With tea: Match with robust black teas (English Breakfast or Assam) or a nutty oolong for a cozy afternoon pairing.
- On a dessert platter: Mix with classic Rice Krispie squares, chocolate-covered pretzels, and candied nuts for variety.
- Pack for lunchboxes or picnics: Wrap individually in parchment paper for an easy portable sweet.
Keeping it Fresh
- Room temperature: Store in an airtight container in a cool, dry place for up to 2 days (best in cooler climates).
- Refrigerator: Airtight container or sealed bag for up to 2 weeks—chilled balls are firmer and easier to handle.
- Freezer: Freeze arranged on a baking sheet until firm, then transfer to a freezer-safe container or bag for up to 3 months. Thaw in the refrigerator or at room temperature before serving.
Pro Tips & Tricks
- Texture balance: Use creamy peanut butter if you want a smoother interior; crunchy peanut butter adds delightful pops of nutty texture.
- Chocolate tempering not required: Because the chocolate is mixed with butter and peanut butter, you won’t need tempering, but a quick chill helps the coating set without bloom.
- Prevent sticking: Lightly dampen your hands or spray with a neutral oil (just a light mist) to keep the mixture from sticking while rolling.
- Even coating: If you want a fully chocolate-coated ball, dip formed balls into melted chocolate and set on parchment; store chilled until the shell firms.
Creative Twists
- S’mores Rice Krispie Balls: Fold in 1/2 cup mini marshmallows and 1/2 cup crushed graham crackers; add a sprinkle of toasted marshmallow on top.
- Dark-chocolate sea-salt: Use dark chocolate chips and finish with flaky sea salt for an elegant, slightly bitter contrast.
- Vegan coconut-chocolate: Replace butter with coconut oil, peanut butter with almond or sunflower seed butter, and use vegan chocolate chips; roll in shredded coconut.
- Peanut-butter cup center: Press a mini peanut-butter cup into the center of each ball while shaping for a hidden candy surprise.
- Cocoa and espresso: Add 1 tablespoon unsweetened cocoa powder and 1 teaspoon instant espresso to the melted mixture for a mocha kick.
Common Questions & Answers
Q: Can I make these nut-free?
A: Yes—substitute sunflower seed butter for peanut butter. Check all ingredient labels to ensure they’re processed in a nut-free facility if needed.
Q: My balls fell apart—what went wrong?
A: Most likely not enough binder. Ensure the melted chocolate–peanut butter–honey mixture is hot enough to coat and bind the cereal; if too cool, add a tablespoon of warm honey or a small drizzle of melted butter and mix quickly.
Q: How do I keep them from getting greasy?
A: Overheating the mixture or using too much butter can cause greasiness. Melt slowly over low heat and stir steadily. Chill the balls to firm up fats.
Q: Can I make them ahead for a party?
A: Yes—store in the refrigerator up to 2 weeks or freeze up to 3 months. Bring to room temperature before serving for softer texture.
Q: Are these healthier than store-bought candy?
A: They’re homemade, so you control ingredients and portions, but they’re still calorie-dense and high in sugar and fat. Use them as an occasional treat; see Mayo Clinic guidance on added sugars for context.
Conclusion
If you enjoyed this recipe and want another similar idea with a chocolate-cereal base, see Slow The Cook Down’s Chocolate Rice Krispie Balls recipe for a slightly different technique and presentation. For a peanut-butter-forward variation that’s equally simple and satisfying, take a look at Jam Jar Kitchen’s Rice Krispie Peanut Butter Balls.
Try the recipe, tweak a variation, and share your photos or tips in the comments—I love seeing how a simple treat becomes your signature version.
Print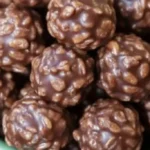
Chocolate Rice Krispie Balls
- Total Time: 25 minutes
- Yield: 12 servings 1x
- Diet: Vegetarian
Description
Delicious no-bake chocolate rice krispie balls with a creamy peanut butter center, perfect for sharing at parties or enjoying as a late-night snack.
Ingredients
- 3 cups Rice Krispies cereal
- 1/2 cup peanut butter (creamy or crunchy)
- 1/2 cup honey or light corn syrup
- 1 cup semi-sweet chocolate chips
- 1/2 cup (1 stick) butter
- 1 teaspoon vanilla extract
- Optional toppings: sprinkles, crushed nuts, flaky sea salt, shredded coconut
Instructions
- Prepare a tray by lining it with parchment paper or a silicone mat.
- In a medium saucepan over low heat, combine butter and chocolate chips. Stir constantly until melted and smooth. Remove from heat.
- Stir in peanut butter, honey (or corn syrup), and vanilla extract until the mixture is homogeneous and glossy.
- In a large mixing bowl, place the Rice Krispies. Pour the chocolate-peanut butter mixture over the cereal and gently fold with a rubber spatula.
- Let the mixture cool for 5 minutes. Form heaping tablespoons into compact balls and place them on the prepared tray.
- Chill the tray in the refrigerator for 20–30 minutes to set.
Notes
If the mixture becomes too stiff to shape, briefly warm it in the microwave or over a double boiler. Use a small cookie scoop for uniform sizes.
- Prep Time: 15 minutes
- Cook Time: 10 minutes
- Category: Dessert
- Method: No-Bake
- Cuisine: American
Nutrition
- Serving Size: 1 ball
- Calories: 270
- Sugar: 20g
- Sodium: 130mg
- Fat: 17g
- Saturated Fat: 8g
- Unsaturated Fat: 9g
- Trans Fat: 0g
- Carbohydrates: 28g
- Fiber: 1g
- Protein: 4g
- Cholesterol: 30mg
Printable Recipe Card
Want just the essential recipe details without scrolling through the article? Get our printable recipe card with just the ingredients and instructions.