Crispy Dill Pickle Parmesan Chicken
A sizzling, tangy crust gives way to tender, juicy chicken — imagine the bright snap of dill and vinegar, the nutty umami of Parmesan, and the irresistible crunch of golden breadcrumbs. As the chicken fries, the kitchen fills with a warm, savory aroma punctuated by a subtle pickle tang that makes your mouth water before the first bite. Each forkful is a contrast of textures: a crisp exterior that flakes apart to reveal moist, flavorful meat. It’s comfort food with a clever twist — playful, bold, and deeply satisfying.
This recipe is perfect for casual weeknight dinners when you want something fast but special, backyard gatherings where finger food disappears in minutes, or an indulgent weekend brunch paired with a crisp salad. If you like experimenting with bold flavors or want to surprise guests with something both familiar and novel, this dish delivers. For another take on crunch and flavor, try this alternate take on crispy dill pickle Parmesan chicken that leans into extra seasoning and oven-finish textures.
At a Glance
- Prep Time: 15 minutes active (plus 30 minutes–2 hours marinating)
- Cook Time: 10–14 minutes (5–7 minutes per side)
- Total Time: 55 minutes–2 hours 30 minutes (including marinating)
- Servings: 4
- Difficulty Level: Easy — great for beginner cooks
Nutrition Highlights
Estimated nutrition per serving (1 chicken breast; values are approximate and calculated using standard portion sizes and USDA FoodData Central nutrient profiles):
- Calories: 630–650 kcal
- Protein: 60–65 g
- Carbohydrates: 30–35 g
- Fat: 20–25 g
- Saturated Fat: ~5–7 g
- Fiber: 1–2 g
- Sodium: variable (can be high due to pickle brine and seasoned breadcrumbs)
Notes on accuracy: These estimates are based on ingredient weights and typical nutrient values from USDA FoodData Central and standard references for common ingredients (chicken breast, breadcrumbs, Parmesan, eggs, flour, and cooking oil). Because frying oil absorption and the salt content of pickle juice/seasoned breadcrumbs vary, sodium and calories may differ — adjust or measure ingredients for more precise tracking. For guidance on daily nutrient recommendations and safe cooking temperatures, consult resources such as the USDA and CDC.
Why You’ll Love It
- Flavor & Texture: The marinade of dill pickle juice tenderizes the chicken and imparts a bright, tangy backbone that cuts through the richness of the Parmesan-crusted exterior, delivering both zest and depth.
- Crowd-Pleaser: It’s a playful riff on classic fried chicken that surprises people — perfect for potlucks, game days, or family dinners.
- Speed & Simplicity: With only a few steps and common pantry ingredients, you can get restaurant-style texture at home without complicated technique.
- Comfort with a Kick: Familiar fried-chicken comfort meets bold, modern flavor — an ideal recipe when you want cozy + adventurous at the same time.
Step-by-Step Instructions
Ingredients
- 4 boneless, skinless chicken breasts
- 1 cup dill pickle juice (from a jar of pickles)
- 1 cup seasoned breadcrumbs
- 1/2 cup grated Parmesan cheese
- 1/2 cup all-purpose flour
- 2 large eggs, whisked
- 1 tsp garlic powder
- 1 tsp onion powder
- 1/2 tsp paprika
- Salt and pepper, to taste
- Cooking oil, for frying (vegetable, canola, or peanut oil recommended)
Optional ingredients and substitutions
- Gluten-free option: use gluten-free all-purpose flour and gluten-free breadcrumbs.
- Lower-sodium approach: rinse the chicken lightly after marinating and use low-sodium breadcrumbs; reduce or omit added salt in the flour mix.
- Extra crunch: substitute panko for the seasoned breadcrumbs or use half panko + half Parmesan.
- Flavor boosts: add 1 tsp dried dill or 1–2 tbsp chopped fresh parsley to the breadcrumb mix.
Preparation and Cooking Steps
- Marinate: Place the chicken breasts in a shallow dish or a zip-top bag. Pour the dill pickle juice over the chicken to cover. Marinate in the refrigerator for 30 minutes up to 2 hours. (Tip: longer marinating increases tang and tenderness but don’t exceed 4 hours to avoid overly soft texture.)
- Prep dredging stations: Set up three shallow dishes. In the first, combine the flour with garlic powder, onion powder, paprika, and a pinch of salt and pepper. In the second dish, place the whisked eggs. In the third, mix the Parmesan and breadcrumbs thoroughly.
- Dry and coat: Remove chicken from the brine and pat each piece dry with paper towels. Lightly dredge a breast in the seasoned flour, shaking off excess. Dip into the whisked eggs, then press into the breadcrumb-Parmesan mixture until evenly coated. Repeat for all pieces.
- Heat oil: In a large skillet, pour oil to a depth of about 1/2 inch. Heat over medium-high heat until shimmering and hot — test by dropping a few breadcrumbs in; they should sizzle and brown slowly, not burn instantly.
- Fry: Carefully add the coated chicken breasts to the hot oil, leaving space between pieces. Fry 5–7 minutes per side, depending on thickness, until golden brown and an instant-read thermometer inserted into the thickest part reaches 165°F (74°C).
- Drain & rest: Transfer cooked chicken to a wire rack set over a baking sheet to drain excess oil and stay crisp. Rest for 3–5 minutes before serving.
Practical tips
- Don’t overcrowd the pan — that drops oil temperature and prevents crisping.
- If pieces are uneven in thickness, gently pound to even thickness for consistent cooking.
- Use a thermometer for safety and to avoid overcooking.
- Keep cooked pieces warm in a 200°F oven on a rack if frying in batches.
Best Pairings
- Serve with a simple green salad dressed with lemon vinaigrette to cut richness.
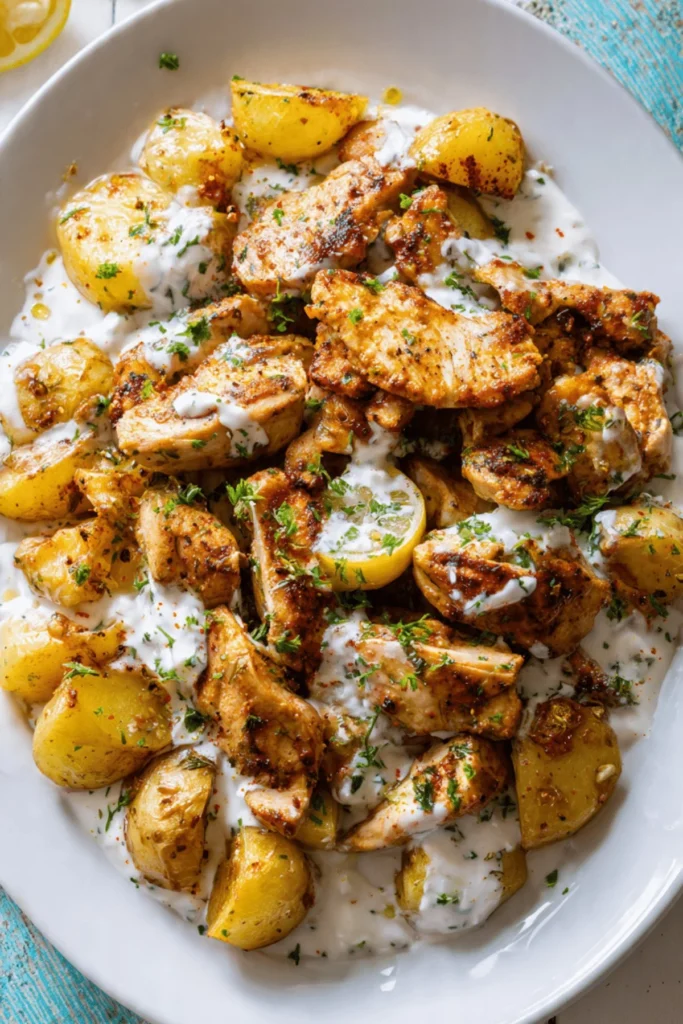
- Crispy dill pickle Parmesan chicken is excellent alongside coleslaw, potato wedges, or fingerling potatoes roasted with herbs.
- For sandwiches: tuck slices into toasted brioche or sourdough with a smear of chipotle mayo or tartar sauce and some shredded lettuce.
- Brunch twist: pair with buttery biscuits and a light cucumber-dill salad, or offer as a savory option with coffee or iced tea.
- Sauce ideas: classic ranch, honey mustard, spicy aioli, or a tangy dill-yogurt sauce complement the flavors.
Storage Instructions
- Room temperature: Cooked chicken should not be left at room temperature for more than 2 hours (1 hour if ambient temp is above 90°F) — follow USDA food safety guidance.
- Refrigeration: Store cooked chicken in an airtight container in the refrigerator for up to 3–4 days.
- Freezer: Wrap individual pieces tightly in plastic wrap and place in a freezer bag; freeze for up to 2–3 months for best quality. Thaw in the refrigerator before reheating.
- Reheating: For best texture, reheat in a 375°F oven on a wire rack for 10–15 minutes until heated through and crisp; avoid microwaving, which makes the crust soggy.
Insider Secrets
- Brine balance: Use straight pickle juice for the most pronounced flavor, or dilute 50/50 with water if you want a milder tang.
- Cheese distribution: Finely grate the Parmesan and mix thoroughly with the breadcrumbs so each bite has balanced umami without clumping.
- Oil management: Maintain oil temperature between 325–350°F. If it’s too hot, the crust will burn; too cool and the coating will soak up oil.
- Texture cue: The crust should be deeply golden and firm to the touch. If it’s pale and soft, increase heat slightly and finish in the oven.
- Make-ahead: You can prepare dredged (but not fried) chicken and keep it refrigerated for a few hours before frying; this can save time when entertaining.
Creative Twists
- Oven-Baked Crunch: Brush the coated breasts lightly with oil and bake at 425°F on a wire rack for 20–25 minutes, flipping once, until internal temp reaches 165°F. Finish with a minute or two under the broiler for extra color.
- Gluten-Free or Panko Upgrade: Use gluten-free breadcrumbs or panko for a lighter, airier crunch.
- Air-Fryer Adaptation: For a lower-oil version, cook in an air fryer at 380°F for 10–12 minutes, flipping halfway; spray lightly with oil for better browning. See an air-fryer adaptation of this recipe for timing tweaks and notes.
- Spicy Kick: Add 1/2–1 tsp cayenne or smoked paprika to the flour for warmth; serve with a spicy sriracha-mayo.
- Vegan Option: Use thick slices of breaded and fried or baked marinated seitan or extra-firm tofu, swap eggs for a flax or chickpea flour “egg,” and use nutritional yeast mixed with panko in place of Parmesan.
Recipe Q&A
Q: Can I skip marinating the chicken in pickle juice?
A: Yes, but marinating adds tang and tenderizes the meat. If short on time, even 15–20 minutes helps.
Q: How can I reduce the sodium?
A: Use low-sodium or unsalted breadcrumbs, rinse the chicken after marinating to remove surface brine, and skip adding extra salt to the flour mix.
Q: My coating falls off while frying — how do I prevent that?
A: Pat the chicken dry, press the breadcrumb mix firmly onto the egg-coated chicken, and let the coated pieces rest on a rack for 5–10 minutes before frying to set the crust.
Q: Is air-frying a good option?
A: Yes — air frying reduces oil and still yields a crisp crust. Preheat the air fryer and spray the coating lightly with oil for best results.
Q: How do I reheat without losing crispiness?
A: Reheat in a 375°F oven on a wire rack until warmed through (10–15 minutes). This method restores crunch better than microwaving.
Conclusion
Give this Crispy Dill Pickle Parmesan Chicken a try the next time you want something playful, bold, and deeply comforting — it’s the kind of recipe that sparks conversation and disappears fast from the plate. If you’re looking for additional versions and inspiration, check out this classic take on the dish at Dill Pickle Parmesan Chicken Recipe – Recipeothy, a crunchy riff with extra tips at Crispy Crispy Dill Chicken – Food My Muse, and another homestead-friendly approach at Dill Pickle Parmesan Chicken – I Am Homesteader. I’d love to see your photos and tweaks — share your results and join the conversation with other readers.
Printable Recipe Card
Want just the essential recipe details without scrolling through the article? Get our printable recipe card with just the ingredients and instructions.