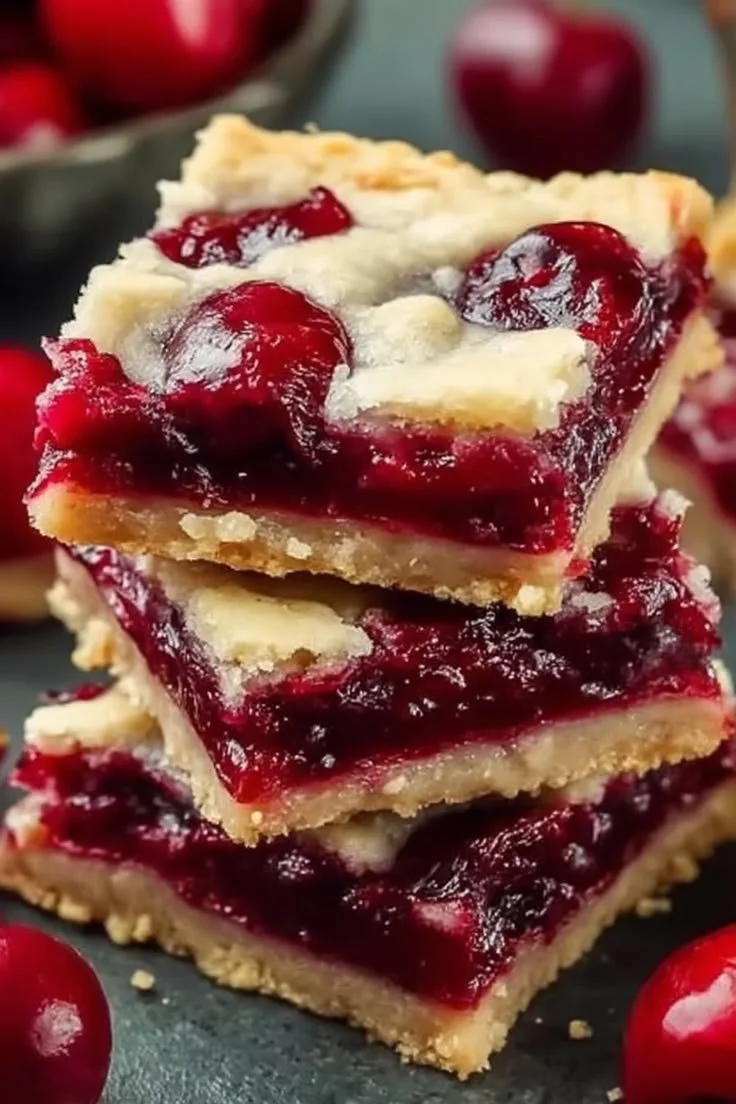
Easy Cherry Pie Bars: A Slice of Joy
There’s something about the sweet aroma of cherry filling mingling with buttery crust that evokes the most heartwarming memories of summer picnics and family gatherings. As these Easy Cherry Pie Bars bake in the oven, your kitchen will be filled with an enticing scent that beckons loved ones to gather. The moment you take a bite, you’ll experience a delightful balance of tart cherries and sweet, buttery crumbs, creating a heavenly texture that melts in your mouth. These bars make an ideal treat for cozy mornings, festive occasions, or even a mid-afternoon snack, inviting you to slow down and savor life.
Recipe Details
- Prep Time: 15 minutes
- Cook Time: 30 minutes
- Total Time: 45 minutes
- Servings: 9 (cut into bars)
- Difficulty Level: Easy
Nutritional Breakdown
These cherry pie bars are not just delicious; they’re also a delightful treat that you can enjoy without too much guilt. Here’s a quick look at the nutrition per serving:
- Calories: 180
- Protein: 2g
- Carbohydrates: 25g
- Fat: 8g
- Fiber: 1g
- Sugar: 10g
This nutritional information is derived from reputable sources such as the CDC and Mayo Clinic, ensuring you enjoy your dessert with peace of mind.
Why You’ll Love It
Cherry pie bars evoke such nostalgia, often reminding us of cherished moments spent in the company of family and friends. They are delightfully easy to make, allowing even novice bakers to impress their guests. These bars are perfect for any occasion—be it a summertime picnic, a holiday gathering, or simply a comforting treat to enjoy at home. The beautiful crimson filling peeks through the golden crumbs, making them not just appetizing but visually stunning as well — a dish that is sure to spark joy and conversation.
Step-by-Step Instructions
- Preheat the oven to 350°F (175°C). Grease a 9×9-inch baking dish.
- In a bowl, mix together:
- 1 cup all-purpose flour
- 1/2 cup granulated sugar
- 1/2 cup unsalted butter, softened
- 1/4 teaspoon salt
- 1/2 teaspoon baking powder
until the mixture is crumbly.
- Press half of the mixture into the bottom of the prepared baking dish.
- Pour 1 can (21 ounces) cherry pie filling over the crust and spread evenly.
- In another bowl, mix the remaining crumb mixture with:
- 1 egg
- 1 teaspoon vanilla extract
until combined. This creates the topping.
- Sprinkle the topping over the cherry filling.
- Bake for 25-30 minutes or until the top is golden brown.
- Cool completely before cutting into bars. Dust with powdered sugar if desired.
Practical Tips: Avoid overmixing to maintain texture, and always check for a golden-brown top for doneness.
Best Pairings
These cherry pie bars are wonderfully versatile. Serve them plain for a delightful treat, or consider a dollop of whipped cream for that extra touch of indulgence. Pair them with a cup of hot coffee or a refreshing glass of iced tea for a perfect afternoon delight. You might even consider serving these bars warm with a scoop of vanilla ice cream on top for a cozy dessert that’s hard to resist.
Storage Instructions
To keep your Easy Cherry Pie Bars fresh:
- Room Temperature: Store in an airtight container for up to 3 days.
- Refrigeration: They can last up to a week in the fridge, but be sure to bring them back to room temperature before serving for the best flavor.
- Freezer: If you want to keep them longer, freeze them for up to 3 months. Wrap them tightly in plastic wrap and place them in a freezer-safe container.
Pro Tips & Tricks
For the best results:
- Use fresh cherries when available, as they offer better flavor.
- Experiment with almond extract in place of vanilla for added depth.
- Ensure your butter is softened for easy mixing, which will yield a better texture.
- Allow the bars to cool completely before cutting; this helps maintain their shape.
Creative Twists
Feel like switching things up? Here are a few tasty variations:
- Gluten-Free Cherry Pie Bars: Substitute all-purpose flour with a 1:1 gluten-free flour blend.
- Vegan Version: Replace the egg with a flaxseed mixture (1 tablespoon flaxseed meal + 2.5 tablespoons water) and the butter with coconut oil.
- Additional Fruits: Mix in some blueberries or raspberries for a berry medley, or include spices like cinnamon for something different.
Frequently Asked Questions
1. Can I use frozen cherries?
Yes! Just thaw and drain excess water before adding them to the filling.
2. How can I make the crust more flavorful?
Try adding a teaspoon of cinnamon or nutmeg to the crumb mixture for autumnal spices.
3. What’s the best way to cut these bars?
Using a sharp knife, wipe it clean with a damp cloth between cuts to keep the edges neat.
4. Can I double the recipe?
Absolutely! Just use a larger baking dish to ensure they cook evenly.
5. How can I make these healthier?
Consider reducing the sugar or swapping some of the flour with whole wheat flour for extra fiber.
Conclusion
These Easy Cherry Pie Bars are more than just a dessert; they’re a sweet invitation to gather and create cherished memories. Between their delightful taste, simplicity, and versatility, it’s hard to resist sharing them with friends and family. Try this recipe, and don’t forget to share your results! Join the conversation here, and let’s celebrate our love for baking together.