Frozen Birthday Cake
Introduction
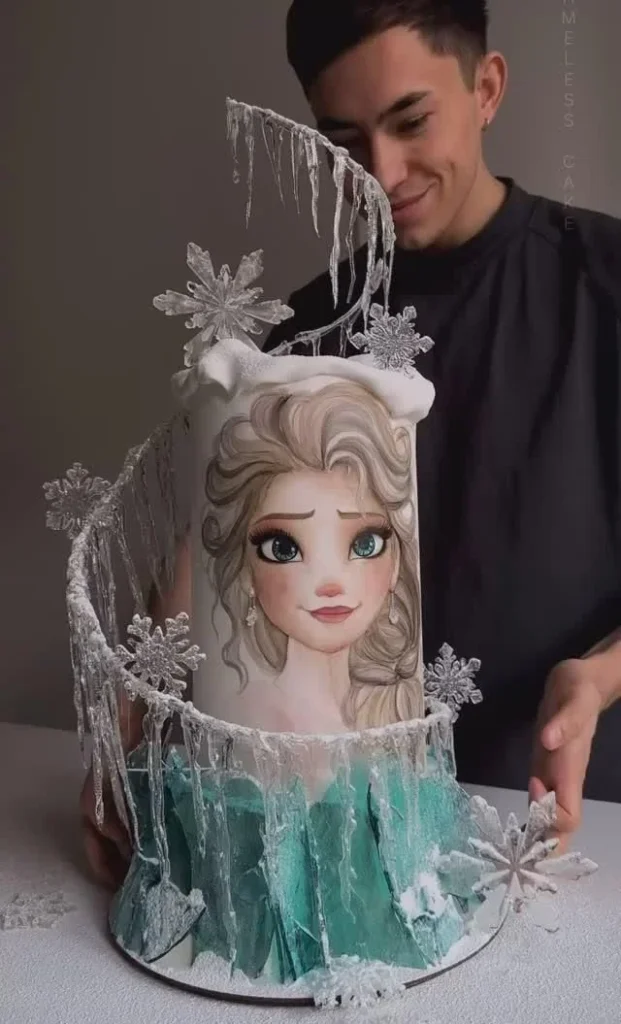
Imagine a cake that smells of warm vanilla and butter as it comes out of the oven, sliced to reveal soft, pillowy layers tinted the palest arctic blue. The first bite is a gentle cascade of sweet buttercream and tender cake — a silky mouthfeel with a tiny, joyful crunch of edible glitter that catches the light like freshly fallen snow. This Frozen-inspired birthday cake blends theatrical presentation with comforting bakery flavors, delivering both a visual spectacle and the familiar joy of a homemade celebration.
This recipe is perfect for children’s birthday parties, winter-themed gatherings, or any time you want a show-stopping dessert with approachable technique. It’s also a great make-ahead option for busy hosts: bake and freeze layers in advance, then assemble the day of. Whether you crave nostalgia, want to create a themed centerpiece, or simply love a classic buttercream cake with a whimsical twist, this Frozen Birthday Cake answers the call.
At a Glance
- Prep Time: 30 minutes (active)
- Cook Time: 25–30 minutes per layer
- Total Time: About 1 hour 30 minutes (including cooling and assembly)
- Servings: 12 generous slices
- Difficulty Level: Intermediate (basic cake assembly and frosting skills)
Nutrition Highlights
Nutrition per serving (approximate)
- Calories: 560 kcal
- Protein: 4.5 g
- Carbohydrates: 70 g
- Fat: 30 g
- Saturated Fat: 18 g
- Fiber: 0.8 g
- Sugar: 45 g
Notes: - These values are estimated for one of 12 slices of the finished cake (vanilla/white cake with butter-based buttercream) and were calculated using ingredient nutrient profiles from USDA FoodData Central and standard calorie conversions (4 kcal/g for carbs & protein, 9 kcal/g for fat). Actual nutrition will vary with brands, portion sizes, and substitutions. For more precise tracking, weigh your final portions and check product labels.
Perfect For…
This Frozen Birthday Cake shines because it combines emotional nostalgia with visual delight:
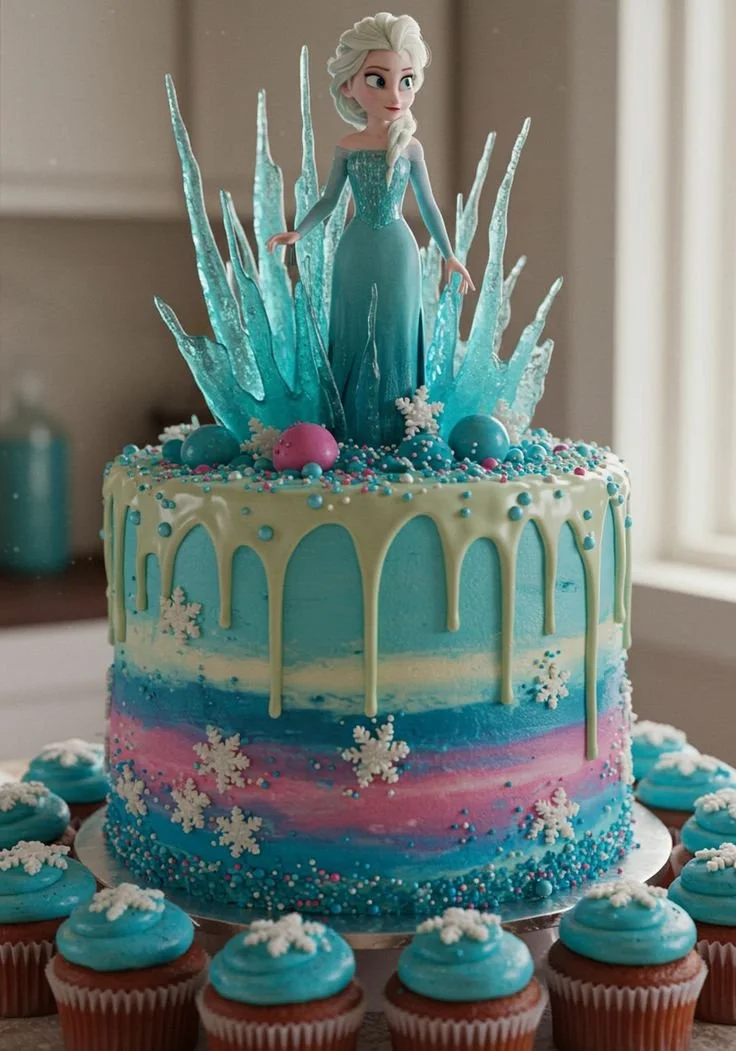
- Irresistible theater: The blue ombré frosting, sparkling edible glitter, and snowflake toppers create an instant focal point for photos and memories.
- Family celebrations: Kids love characters and color themes; adults appreciate classic vanilla-butter flavors everyone recognizes.
- Make-ahead convenience: Layers can be baked or frozen ahead of time; assembly and decoration are quick on party day.
- Seasonal appeal: Ideal for winter birthdays, holiday parties, or any event where a frosty, whimsical centerpiece elevates the table.
How to Make Frozen Birthday Cake
Ingredients
- 1 (15.25 oz / ~432 g) white or vanilla cake mix
- 3 large eggs
- 1/2 cup (113 g) unsalted butter, melted
- 1 cup (240 ml) whole milk
- Blue gel food coloring (start with 1/4 tsp and add more to deepen color)
- For buttercream:
- 1 cup (227 g) unsalted butter, room temperature
- 4 cups (480 g) powdered sugar, sifted
- 2–3 tablespoons milk or heavy cream
- 1 teaspoon pure vanilla extract
- Pinch of salt
- Decorations:
- Edible glitter (food-safe)
- Snowflake cake toppers (edible or decorative)
- Optional: Frozen-themed plastic figurines, silver dragees, white sanding sugar
Optional ingredients & substitutions
- For dairy-free: Use plant-based butter and non-dairy milk; choose a vegan cake mix or make a scratch vegan vanilla cake.
- For gluten-free: Use a certified gluten-free white cake mix.
- To reduce sugar: Use a lighter buttercream (half butter, half whipped cream stabilized with mascarpone) — note this changes texture and shelf life.
- For deeper blue/ombre effect: Tint multiple small batches of frosting in graduated shades.
Step-by-step method
- Preheat your oven to the temperature listed on the cake mix box (typically 350°F / 175°C). Grease and line two 8- or 9-inch round cake pans with parchment.
- Prepare the cake mix according to the package instructions, substituting melted butter and milk for the oil/water called for if you prefer richer flavor; add the eggs, melted butter, milk, and mix until combined. Add blue gel food coloring a little at a time until you reach the desired hue.
- Pour the batter evenly into the prepared pans and bake as directed on the box, usually 25–30 minutes, or until a toothpick inserted in the center comes out clean.
- Allow the cakes to cool in the pans 10 minutes, then turn out onto a rack to cool completely. Cool fully before assembling to prevent buttercream from melting.
- Level the cakes with a serrated knife if necessary. Place one layer on a cake board or serving plate and spread an even layer of buttercream between layers.
- Frost the entire cake with a thin crumb coat and chill 15–20 minutes to set. Apply a final coat of buttercream; for an ombré effect, tint portions of frosting different shades of blue and apply in bands, smoothing or feathering where they meet.
- Sprinkle edible glitter lightly over the top and place snowflake toppers. Add any additional Frozen-themed decorations, being mindful of non-edible items.
- Serve at the birthday party and enjoy the magic!
Practical tips
- Avoid overmixing the batter — mix until ingredients are combined to keep the crumb tender.
- Use gel colors instead of liquid to avoid thinning the batter or frosting.
- Check doneness by toothpick and by gently pressing the top — it should spring back.
- If frosting becomes too soft while decorating, chill the cake for 10–15 minutes to firm it up.
Presentation Tips
- Center the cake on a cake board slightly larger than the base for neat transport.
- Add a dusting of white sanding sugar around the base to mimic snowdrifts.
- For a dramatic reveal, present the cake on a mirrored cake stand with battery-operated fairy lights around the base (keep lights away from actual food).
- Serve slices with a dollop of lightly whipped cream or a small scoop of vanilla ice cream to balance the sweetness.
Keeping it Fresh
- Room temperature: The cake (covered) is fine at cool room temperature for up to 24–48 hours if kept away from heat and direct sunlight; buttercream can soften in warm rooms.
- Refrigeration: Store in an airtight cake carrier or covered with plastic wrap for up to 4–5 days. Bring slices to room temperature before serving for best texture.
- Freezer: Cake layers (unfrosted) freeze well for up to 2–3 months wrapped tightly in plastic and foil. Frosted cakes can be frozen for up to 2 months if well wrapped; thaw in the refrigerator overnight and bring to room temperature before serving.
Insider Secrets
- Use a chilled offset spatula and smooth with a hot (briefly run under hot water and dried) spatula for ultra-smooth buttercream.
- For even layers, weigh batter into pans with a kitchen scale.
- A simple syrup (1:1 sugar to water, brushed on layers) adds moisture and keeps slices tender for make-ahead cakes.
- If you want a lighter, less sweet frosting, reduce powdered sugar slightly and increase vanilla and salt to balance flavor — taste as you go.
Fun Flavor Ideas
- Lemon-Blueberry Twist: Fold 1 cup fresh blueberries into the batter and add 1 tablespoon lemon zest to the batter; tint frosting very pale blue.
- Chocolate Base: Use a chocolate cake mix for the layers and contrast with vanilla-blue buttercream for an unexpected richness.
- Vegan Version: Replace eggs with flax eggs (1 tbsp ground flax + 3 tbsp water per egg), use plant-based butter and non-dairy milk, and choose a vegan cake mix.
- Spiced Winter: Add 1 teaspoon ground cinnamon and 1/4 teaspoon nutmeg to the batter for a warm undertone that pairs beautifully with the “snow” decorations.
All Your Questions Answered
Q: Can I make this cake the day before the party?
A: Yes. Bake layers a day or two ahead and wrap tightly. Frost and decorate the day of for best freshness, or assemble and refrigerate up to 24 hours before serving.
Q: How do I fix a dry cake?
A: Brush each layer lightly with simple syrup (equal parts sugar and water, warmed to dissolve) before layering to add moisture.
Q: Are edible glitters safe?
A: Only use glitters labeled “edible” and approved for food use. Avoid craft glitters which are not food-safe.
Q: Can I freeze the fully decorated cake?
A: You can freeze a decorated cake if all decorations are edible and free of delicate items; wrap tightly and freeze up to 2 months. Thaw overnight in the refrigerator.
Conclusion
If you love making celebrations feel magical with a little sparkle and classic flavors, this Frozen Birthday Cake is a rewarding, crowd-pleasing project — perfect for creating lasting birthday memories. For inspiration on commercially made Elsa-themed cakes, check out Elsa Birthday Cakes which can give ideas for toppers and color palettes. If you want an alternative mini-cake presentation or to see a beautiful ombré technique in action, browse examples like Frozen Ombre Mini Cakes – Two Sisters to spark your decorating creativity.
Ready to bake? Share your photos and variations — I’d love to see how you make the magic come to life.
Print
Frozen Birthday Cake
- Total Time: 90 minutes
- Yield: 12 slices 1x
- Diet: Vegetarian
Description
A visually stunning Frozen-themed birthday cake with soft, pillowy layers and a delightful buttercream frosting that kids and adults will love.
Ingredients
- 1 (15.25 oz / ~432 g) white or vanilla cake mix
- 3 large eggs
- 1/2 cup (113 g) unsalted butter, melted
- 1 cup (240 ml) whole milk
- Blue gel food coloring (start with 1/4 tsp)
- 1 cup (227 g) unsalted butter, room temperature (for buttercream)
- 4 cups (480 g) powdered sugar, sifted
- 2–3 tablespoons milk or heavy cream
- 1 teaspoon pure vanilla extract
- Pinch of salt
- Edible glitter (food-safe)
- Snowflake cake toppers (edible or decorative)
- Optional: Frozen-themed plastic figurines, silver dragees, white sanding sugar
Instructions
- Preheat oven to the temperature listed on the cake mix box (typically 350°F / 175°C) and prepare two 8- or 9-inch round cake pans with parchment.
- Prepare the cake mix per package instructions, using melted butter and milk instead of oil/water; mix in eggs and gel food coloring.
- Pour batter evenly into prepared pans and bake for 25–30 minutes or until a toothpick comes out clean.
- Cool cakes in pans for 10 minutes, then turn onto a rack to cool completely.
- Level the cakes if necessary. Place one layer on a cake board and spread buttercream between layers.
- Frost the entire cake with a thin crumb coat and chill for 15–20 minutes to set, then apply a final coat of buttercream, using tinted portions for an ombré effect.
- Sprinkle edible glitter and place snowflake toppers on top. Add any extra decorations as desired.
- Serve and enjoy your creation!
Notes
For dairy-free, use plant-based substitutes. For gluten-free, opt for a certified gluten-free cake mix. To reduce sugar, consider a lighter buttercream.
- Prep Time: 30 minutes
- Cook Time: 30 minutes
- Category: Dessert
- Method: Baking
- Cuisine: American
Nutrition
- Serving Size: 1 slice
- Calories: 560
- Sugar: 45g
- Sodium: 200mg
- Fat: 30g
- Saturated Fat: 18g
- Unsaturated Fat: 10g
- Trans Fat: 0g
- Carbohydrates: 70g
- Fiber: 0.8g
- Protein: 4.5g
- Cholesterol: 100mg
Printable Recipe Card
Want just the essential recipe details without scrolling through the article? Get our printable recipe card with just the ingredients and instructions.