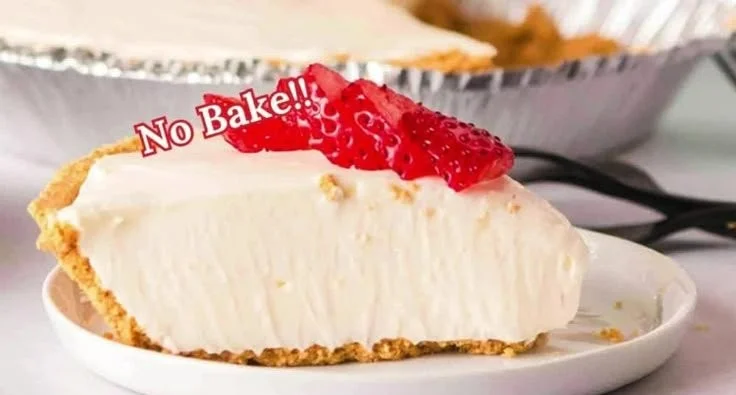
No Bake Peanut Butter Cheesecake
Imagine cutting into a silky, peanut-butter-scented cheesecake: the fork glides through a dense, cloudlike filling that yields to a buttery, slightly crunchy graham crust. The first bite is an immediate hush—creamy peanut butter, a gentle sweetness from powdered sugar, a whisper of vanilla, and the cool, airy lift of whipped cream. Chocolate shavings or crushed peanut butter cups on top add a playful crunch and a bittersweet counterpoint.
This no bake peanut butter cheesecake is comfort in dessert form. It’s perfect for warm evenings when you want something rich without turning on the oven, for potlucks and holiday gatherings where make-ahead ease is king, or as a celebratory treat for birthdays and weekend indulgence. It’s also a cozy weekend project—simple steps, big payoff—especially suited to bakers who love bold flavors and smooth textures.
At a Glance
- Prep Time: 20 minutes
- Cook Time: 0 minutes (no baking)
- Total Time: about 4 hours 20 minutes (including chilling)
- Servings: 12 slices (based on a 9-inch springform pan)
- Difficulty Level: Easy
Nutrition Highlights
Below is an approximate nutritional breakdown per serving (1 of 12 slices). These estimates were calculated from standard ingredient values (USDA FoodData Central) and rounded for clarity. If you need precise numbers for medical or dietary reasons, weigh your specific ingredients and consult a registered dietitian.
Per serving (approximate):
- Calories: 500 kcal
- Protein: 7.5 g
- Carbohydrates: 25 g
- Sugars: ~18 g
- Dietary fiber: ~1.5 g
- Fat: 33 g
- Saturated fat: ~16 g
- Sodium: ~220 mg
Notes on accuracy and health context:
- Values are estimates based on aggregated food composition data (USDA FoodData Central) and typical serving sizes. For general guidance on calorie and macronutrient needs, see resources from the Centers for Disease Control and Prevention (CDC) and the Mayo Clinic.
- This dessert is energy-dense—deliciously so. Enjoy it in moderation, and consider portion sizes if you follow a specific nutrition plan.
Why You’ll Love It
- Taste & Texture: If you’re a peanut-butter lover, this cheesecake hits the sweet spot—rich, nutty peanut butter flavor balanced by light whipped cream and a buttery crust. The contrast between a crunchy crust and luxuriously smooth filling is irresistible.
- Ease & Make-Ahead: No oven, no fuss. The dessert comes together quickly and benefits from chilling, so you can make it the day before a gathering and free yourself to enjoy company instead of baking.
- Crowd-Pleaser & Comfort Food: It’s a nostalgic flavor that often brings smiles—perfect for family gatherings, birthdays, or a cozy night in with coffee.
- Versatile: Dress it up with chocolate, banana slices, caramel, or keep it classic. Variations can make it gluten-free or vegan with suitable swaps.
Step-by-Step Instructions
Ingredients
- 1 1/2 cups graham cracker crumbs
- 1/2 cup unsalted butter, melted
- 1 cup creamy peanut butter
- 1 cup powdered sugar
- 1 cup cream cheese, softened
- 1 cup whipped cream (see tips for stabilizing)
- 1 teaspoon vanilla extract
- Optional garnish: chocolate shavings or crushed peanut butter cups
Optional ingredients & substitutions
- For a crispier, gluten-free crust: substitute almond flour (1 1/2 cups) or gluten-free graham crumbs.
- Lower-sugar option: use a powdered sugar substitute measured for baking; texture may vary.
- For a lighter version: use reduced-fat cream cheese and a natural peanut butter with no added sugar, but expect slightly different texture and flavor.
- To stabilize whipped cream (so it holds longer on the cheesecake): fold in 1 tablespoon powdered sugar plus 1 tablespoon unflavored gelatin dissolved according to package instructions (or use 2 tablespoons instant clearjel for a vegetarian alternative).
Directions
- In a mixing bowl, combine the graham cracker crumbs and melted butter. Stir until the crumbs are evenly moistened.
- Press the mixture into the bottom of a 9-inch springform pan (or similar) to form an even crust. Use the bottom of a glass to press firmly and compact the crust. Chill in the refrigerator while you prepare the filling (10–15 minutes helps it set).
- In another bowl, beat together the peanut butter, powdered sugar, and softened cream cheese until smooth and fully combined. Scrape down the sides as needed for even mixing.
- Fold in the whipped cream and vanilla extract gently until well combined, keeping the mixture light and airy. Avoid overmixing to preserve texture.
- Pour the peanut butter mixture over the chilled crust and spread evenly with an offset spatula or back of a spoon.
- Refrigerate for at least 4 hours or until set (overnight gives the best sliceable texture).
- Before serving, garnish with chocolate shavings, crushed peanut butter cups, or a drizzle of melted chocolate if desired.
Practical tips while making:
- Soften cream cheese to room temperature for smooth blending—cold cream cheese yields lumps.
- When folding in whipped cream, use a gentle hand: large strokes from bottom to top preserve air.
- If the crust feels loose after pressing, chilling it briefly before adding filling helps it bind.
- For cleaner slices, run a sharp knife under hot water, wipe dry, and slice between heats; repeat between cuts.
Best Pairings
- Beverage pairings: a strong black coffee or espresso cuts through richness; a full-bodied milk or chocolate milk is comfortingly indulgent. For adults, a glass of tawny port or an oat-milk latte makes a cozy match.
- Toppings & accompaniments: fresh banana slices, salted caramel drizzle, or a dollop of extra whipped cream. Serve with berry compote to add bright acidity if you want contrast.
- Serving format: as classic slices on dessert plates, mini cheesecake cups for parties, or alongside a scoop of vanilla ice cream to elevate the experience.
Storage Instructions
- Room temperature: Not recommended for more than 2 hours due to cream cheese and whipped cream—keep perishable desserts chilled.
- Refrigeration: Store in an airtight container or keep the cheesecake covered (loosely with plastic wrap) for up to 3–4 days. For best texture, consume within 48–72 hours.
- Freezer: Wrap the whole cheesecake (or individual slices) tightly in plastic wrap and then a layer of aluminum foil; freeze up to 2 months. Thaw overnight in the refrigerator before serving; re-whip a little fresh cream to refresh the top if needed.
Pro Tips & Tricks
- Use room-temperature cream cheese and peanut butter for the smoothest filling—this prevents lumps and ensures even mixing.
- Stabilize whipped cream when you need the cheesecake to hold up for a party: either add dissolved gelatin (as noted above) or fold in a couple of tablespoons of mascarpone or stabilized whipped topping to maintain structure.
- Avoid over-sweetening: powdered sugar is forgiving, but taste the filling (briefly) before adding all the sugar if you use an especially sweet peanut butter.
- Press crust firmly and chill it before filling to prevent a soggy bottom.
- For the cleanest slices, chill until fully set and use a hot, dry knife warmed under hot water and wiped clean between each cut.
Creative Twists
- Chocolate-Peanut Butter Swirl: Melt 3/4 cup semi-sweet chocolate and swirl it through the peanut butter filling before chilling for a marbled effect.
- Banana-Peanut Butter Cheesecake: Fold in 1/2 cup mashed ripe banana to the filling or layer thinly sliced bananas between crust and filling for an homage to a PB&J banana cream.
- Vegan Version: Use vegan cream cheese (1 cup), vegan butter (1/2 cup) for the crust, natural peanut butter, powdered sugar or a confectioners’ sugar substitute, and 1 cup aquafaba whipped to stiff peaks in place of whipped cream. Chill as usual.
- Gluten-Free Crust: Swap graham crumbs for almond flour + a touch of honey or use certified gluten-free graham crackers.
- Salted Caramel Finish: Drizzle a salted caramel sauce over the top before serving for a sweet-salty lift.
Frequently Asked Questions
Q: Can I make this ahead for a party?
A: Yes—best made a day ahead. Chill at least 4 hours, preferably overnight. Keep refrigerated until serving.
Q: My filling was grainy—what happened?
A: Graininess often comes from under-whipped or cold cream cheese. Ensure cream cheese is softened to room temperature and beat until smooth before adding other ingredients.
Q: How can I make the whipped cream hold longer?
A: Stabilize it by folding in a small amount of dissolved gelatin or by using mascarpone or a commercial whipped topping designed to hold shape.
Q: Can I halve the recipe?
A: Yes—ingredients scale linearly. Use a smaller pan and reduce chilling time slightly for a thinner cheesecake.
Q: Is there a lower-calorie option?
A: Use reduced-fat cream cheese, natural peanut butter with no added sugar, and a sugar substitute appropriate for baking, but expect changes in texture and richness.
Conclusion
Give this no bake peanut butter cheesecake a try the next time you want a show-stopping dessert with minimal fuss. If you’d like a variation or a video walkthrough to guide you, check out this classic version on No Bake Peanut Butter Cheesecake – Crazy for Crust, or follow a step-by-step video recipe at No Bake Peanut Butter Cheesecake with Video | Julie Blanner. Share your photos and tweaks—I’d love to hear how you made it your own!
Print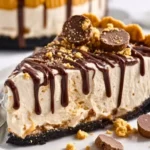
No Bake Peanut Butter Cheesecake
- Total Time: 260 minutes
- Yield: 12 slices 1x
- Diet: Vegetarian
Description
A rich and creamy no bake peanut butter cheesecake with a crunchy graham cracker crust, perfect for any occasion.
Ingredients
- 1 1/2 cups graham cracker crumbs
- 1/2 cup unsalted butter, melted
- 1 cup creamy peanut butter
- 1 cup powdered sugar
- 1 cup cream cheese, softened
- 1 cup whipped cream
- 1 teaspoon vanilla extract
- Optional garnish: chocolate shavings or crushed peanut butter cups
Instructions
- In a mixing bowl, combine graham cracker crumbs and melted butter. Stir until evenly moistened.
- Press the mixture into the bottom of a 9-inch springform pan to form an even crust. Chill in the refrigerator for 10-15 minutes.
- In another bowl, beat peanut butter, powdered sugar, and softened cream cheese until smooth.
- Fold in whipped cream and vanilla extract gently and avoid overmixing.
- Pour the peanut butter mixture over the chilled crust and spread evenly.
- Refrigerate for at least 4 hours or until set.
- Before serving, garnish with chocolate shavings or crushed peanut butter cups.
Notes
For a gluten-free option, substitute almond flour or gluten-free graham crumbs. To stabilize whipped cream, fold in 1 tablespoon powdered sugar plus 1 tablespoon dissolved gelatin.
- Prep Time: 20 minutes
- Cook Time: 0 minutes
- Category: Dessert
- Method: No Bake
- Cuisine: American
Nutrition
- Serving Size: 1 slice
- Calories: 500
- Sugar: 18g
- Sodium: 220mg
- Fat: 33g
- Saturated Fat: 16g
- Unsaturated Fat: 15g
- Trans Fat: 0g
- Carbohydrates: 25g
- Fiber: 1.5g
- Protein: 7.5g
- Cholesterol: 30mg
Printable Recipe Card
Want just the essential recipe details without scrolling through the article? Get our printable recipe card with just the ingredients and instructions.