
No Knead Italian Artisan Bread
Introduction
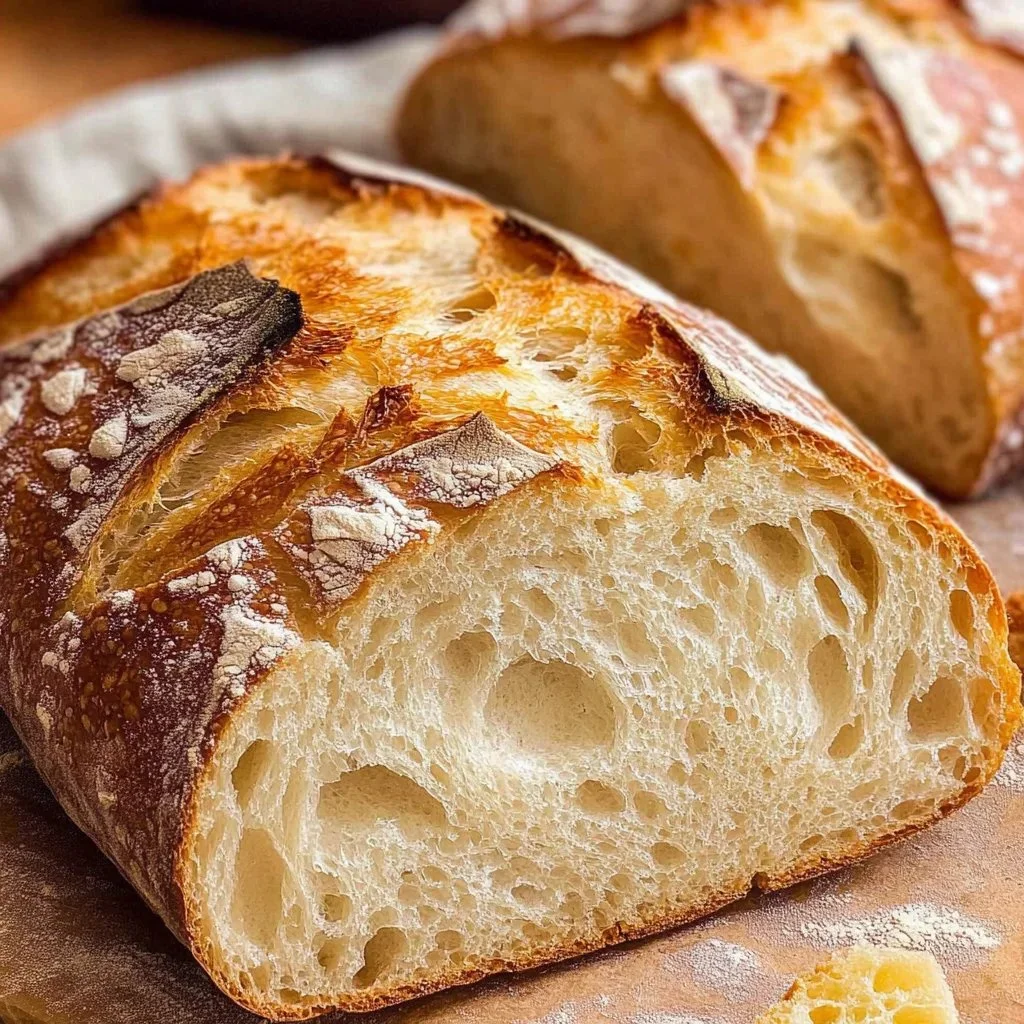
There’s nothing quite like the smell of a freshly baked loaf pulling warmth and comfort through a kitchen—the toasty, slightly sweet aroma of browned crust, the soft, open crumb that yields with a gentle squeeze, the satisfying crackle as you slice. This no-knead Italian artisan bread delivers those sensory pleasures with minimal effort: a golden, blistered crust that crunches underbite, a tender, chewy interior threaded with delicate air pockets, and a whisper of honeyed sweetness balancing the salt.
This recipe is perfect for cozy weekend breakfasts with butter and jam, impromptu dinner guests, sandwich nights, or to accompany a big pot of soup on chilly evenings. It’s simple enough for a weeknight (mix and forget), and elegant enough to bring to gatherings. If you want a gluten-free approach or inspiration for alternative flours, try this helpful guide to gluten-free no-knead variations for more ideas.
At a Glance
- Prep Time: 10 minutes active (plus 45–90 minutes rise)
- Cook Time: 35–40 minutes (425°F then 325°F)
- Total Time: 55–140 minutes (depending on rise time)
- Servings: 8 slices (one small loaf)
- Difficulty Level: Easy — beginner friendly (no kneading required)
Nutrition Highlights
Estimated nutrition per serving (1 slice, 1/8 of loaf). Values derived from USDA FoodData Central raw ingredient data and portion calculations; sodium context from Mayo Clinic guidance on daily intake.
- Calories: ~128 kcal
- Protein: ~3.6 g
- Carbohydrates: ~27.5 g
- Dietary Fiber: ~0.95 g
- Total Fat: ~0.4 g
- Sodium: ~290 mg
Notes on sources and accuracy:
- Macronutrient and calorie estimates use standard values for enriched all-purpose flour, honey, and small quantities of yeast and salt from government nutrient databases (USDA FoodData Central). These are estimates and will vary with precise measurements and any optional additions (cheese, oil, seeds).
- Sodium is significant because the recipe contains about 1 teaspoon of salt (~2,325 mg sodium per teaspoon total loaf); the per-slice estimate helps you gauge intake against recommended daily limits (Mayo Clinic and other health organizations advise keeping sodium moderate, typically aiming for below 2,300 mg/day for most adults).
Why You’ll Love It
- Irresistible aroma and texture: The scorched, crackly crust contrasted with an open, chewy crumb makes each slice a delight—ideal for tearing and dipping or for elegant bruschetta.
- Comfort with minimal fuss: This is the ultimate “set it and forget it” bread. No kneading, only a gentle stir and a longresting rise, so it’s forgiving and low-effort.
- Social and seasonal appeal: Bring it to a winter soup night, pair it with salads in summer, or use it for holiday boards—its rustic look and warm smell create cozy, memorable moments.
- Flexible and wallet-friendly: Uses pantry staples, and you can easily add herbs, olives, or cheese for different occasions without a lot of extra cost or skill.
How to Make No Knead Italian Artisan Bread
Ingredients
- 2 ¼ cups all-purpose flour
- ¾ cup lukewarm water (plus ¼ cup lukewarm water to activate yeast)
- 1 ⅛ teaspoon instant dry yeast
- 1 teaspoon honey
- 1 teaspoon salt
Optional ingredients / substitutions
- 1 tablespoon olive oil (for softer crust)
- 1–2 tablespoons mixed dried or fresh herbs (rosemary, thyme, oregano)
- 1/3 cup grated Parmesan or Pecorino for a savory loaf
- ¼–½ cup whole wheat flour (substitute up to 25% for a heartier loaf)
- For a gluten-free version, see specialized recipes like this gluten-free technique and adaptation (works with gluten-free flour blends designed for yeast breads).
Step-by-step Instructions
- Activate the yeast: In a small bowl, dissolve 1 teaspoon honey in ¼ cup of lukewarm water (about 95–105°F / 35–40°C). Sprinkle 1 ⅛ teaspoon instant dry yeast over the top and let sit for about 5 minutes until foamy and bubbly.
- Combine dry ingredients: In a large mixing bowl, whisk together 2 ¼ cups all-purpose flour and 1 teaspoon salt.
- Mix the dough: Make a well in the flour and pour in the yeast mixture and the remaining ¾ cup lukewarm water (add olive oil now if using). Use a wooden spoon or spatula to mix gently until a soft, sticky dough forms. Avoid overmixing—once the flour is incorporated and the dough is shaggy, stop.
- First rise: Cover the bowl with a damp cloth or plastic wrap and let the dough rise in a warm place for 45 minutes to 1 hour 30 minutes, or until roughly doubled in size. (Colder kitchens will need longer; the goal is a noticeable puff, not necessarily perfect doubling.)
- Preheat oven: About 20 minutes before baking, preheat your oven to 425°F (220°C). If you have a Dutch oven or heavy covered pot, place it in the oven to heat as well—baking inside a preheated covered vessel creates steam and a superior crust.
- Shape and score: Lightly flour a baking sheet or a piece of parchment. Turn the dough out onto a well-floured surface and shape gently into a round (do not punch down aggressively). Transfer to the baking sheet or parchment. Using a sharp knife or lame, score a few shallow slashes across the top to control expansion.
- Bake at high heat: Place the loaf in the oven and bake at 425°F (220°C) for approximately 25 minutes. If using a Dutch oven, bake covered for 20–25 minutes to trap steam, then remove the lid for the final crust development.
- Reduce heat and finish: After the initial bake, lower the temperature to 325°F (160°C) and bake for an additional 10–15 minutes until the crust is deeply golden and the loaf sounds hollow when tapped on the bottom.
- Cool: Transfer the loaf to a wire rack and cool for at least 15 minutes before slicing—this resting time helps set the crumb and prevents a gummy interior.
Practical tips
- Water temperature: Keep lukewarm — too hot can kill yeast, too cool slows rise.
- Don’t overflour when shaping; a lightly floured surface prevents sticking but maintains hydration.
- Check doneness by tapping the bottom (hollow sound) or using an instant-read thermometer; internal temp should be ~190–200°F (88–93°C).
- If your oven runs cool or you want extra oven spring, bake in a preheated covered pot (Dutch oven) to capture steam.
Best Pairings
- Classic: Thick slices with unsalted butter and a sprinkle of flaky sea salt.
- Breakfast: Toasted, topped with ricotta and honey or smashed avocado and a soft-poached egg.
- Savory: Serve alongside tomato basil soup, minestrone, or a creamy pasta.
- Appetizer: Turn into bruschetta—rub with garlic, drizzle with olive oil, and add tomatoes or roasted peppers.
- Cheese board: Pairs beautifully with aged cheeses like Pecorino or Manchego, cured meats, olives, and fig jam.
Shelf Life & Storage
- Room temperature: Store in a bread box or loosely wrapped in a clean kitchen towel for 1–3 days; best eaten within 48 hours for peak texture.
- Refrigeration: Not recommended for texture preservation—refrigeration speeds staling. If you must, keep in an airtight container for up to 4–5 days; re-crisp in a hot oven before serving.
- Freezer: Wrap cooled slices or whole loaf tightly in plastic wrap and foil, or place in a freezer bag. Freeze up to 3 months. Thaw at room temperature and reheat in a 350°F (175°C) oven for 10–15 minutes to refresh the crust.
Pro Tips & Tricks
- Use a Dutch oven or cast-iron pot for the best crust—its trapped steam simulates a professional steam-injected oven.
- For a more open crumb, increase hydration slightly (add 1–2 tablespoons more water) but be careful—stickier dough is harder to handle.
- Scoring technique: Keep slashes shallow (¼–½ inch) and at a slight angle to allow controlled expansion and a decorative look.
- For extra crunch, mist the loaf with water before placing in the oven (or place an oven-safe dish of water on the rack below).
- If your loaf browns too quickly, tent with foil in the last 10 minutes while the internal temperature finishes rising.
Creative Twists
- Olive & Rosemary: Fold in ¼ cup chopped cured olives and 1 tablespoon chopped fresh rosemary into the dough before the first rise.
- Cheesy Garlic: Mix ⅓ cup grated Parmesan and 1 teaspoon garlic powder into the dough for a savory, fuller-flavored loaf.
- Multigrain Harvest: Replace ¼ cup of the all-purpose flour with whole wheat flour and add 2 tablespoons of seeds (sunflower, flax) for texture and nutrition.
- Sweet Honey Oat: Brush the top with a little honey and sprinkle with rolled oats before baking for a slightly sweet breakfast loaf.
Frequently Asked Questions
Q: Can I use active dry yeast instead of instant?
A: Yes—use the same amount but proof it in the warm water with honey for 5–10 minutes until bubbly before adding to the flour.
Q: My bread is dense—what went wrong?
A: Possible causes: not enough rise time, too little yeast activation, or overflouring. Ensure the dough had time to puff up and that hydration and yeast were correct.
Q: How do I get a crispier crust?
A: Bake in a preheated Dutch oven or add steam by placing an oven-safe tray with hot water below the loaf during the first 10 minutes. Also cool on a rack uncovered.
Q: Can I scale this recipe up?
A: Yes—multiply ingredients proportionally. Allow for longer rise times for larger dough masses.
Q: Is this recipe suitable for diabetics or lower-carb diets?
A: This is a wheat-based bread and contains significant carbs. For lower-carb or specific medical diets, consult a healthcare provider and consider alternative flours or portion control.
Conclusion
If you’ve been craving bakery-quality bread without the fuss, this no-knead Italian artisan loaf is your answer—simple ingredients, big reward, and flexible enough to adapt to many meals and occasions. Try it this weekend, share a warm slice with someone you love, and tag your results to join the conversation.
For inspiration and similar rustic techniques, check out this beautiful take on a no-knead, rustic Italian-style loaf at No-Knead, Rustic, Italian-style Bread – SugarLoveSpices.
For another classic explanation of the no-knead method and its origins, see Amazing Artisan Bread for 40 Cents a Loaf – No Kneading, No ….
Printable Recipe Card
Want just the essential recipe details without scrolling through the article? Get our printable recipe card with just the ingredients and instructions.


