Oven-Baked Cheesy Tacos (Crispy & Loaded) You’ll Love
Introduction
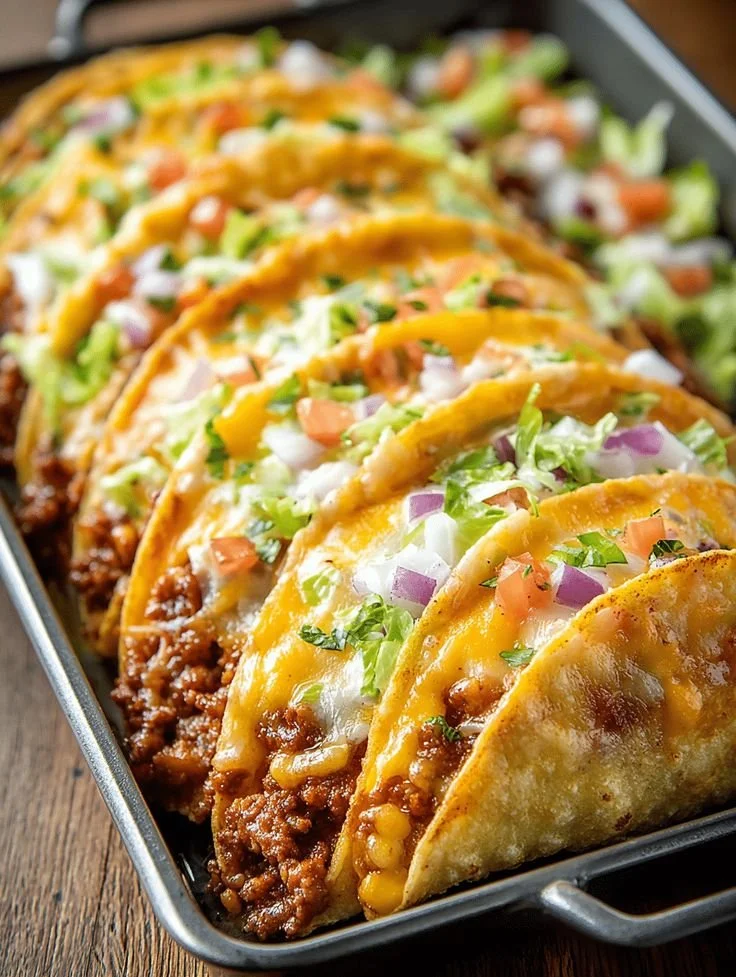
The moment these oven-baked cheesy tacos come out of the oven, the kitchen fills with the warm, irresistible smell of toasted shells, bubbling cheddar, and seasoned meat — a savory perfume that makes everyone pull their chairs a little closer. Each bite is a satisfying contrast: a lightly crisped taco shell giving way to juicy, spiced meat and molten cheese, topped with the cool snap of lettuce, the bright pop of tomato, and the herbal kiss of fresh cilantro. It’s comfort food with attitude — playful, crowd-pleasing, and deeply, deliciously nostalgic.
This recipe is perfect for weeknight dinners when you want something fast but special, for game-day gatherings where finger food reigns, or for casual weekend get-togethers when you want to feed a small crowd without fuss. It’s also a great make-ahead idea for potlucks: the tacos stay crispier in the oven than assembled alternatives and deliver consistent flavor every time.
At a Glance
- Prep Time: 15 minutes
- Cook Time: 12–15 minutes (10 minutes stovetop + 10–15 minutes in oven)
- Total Time: 30–35 minutes
- Servings: 4 (about 2–3 tacos per person if using 10 small shells)
- Difficulty Level: Easy — great for beginner cooks and busy households
Nutrition Highlights
Estimated nutrition per serving (recipe serves 4). These are approximations calculated from common ingredient values and standard portion sizes; values will vary by brands and exact ingredients. Estimates are based on USDA FoodData Central values and general nutrition references (USDA, CDC).
Per serving (approx):
- Calories: 620–650 kcal
- Protein: ~44–48 g
- Carbohydrates: ~36–40 g
- Fat: ~30–34 g
- Fiber: ~3–4 g
- Sodium: ~700–900 mg (variable; check taco seasoning and cheese labels)
Notes:
- Sodium can be high depending on packaged taco seasoning and cheese. The CDC recommends limiting sodium to less than 2,300 mg/day for most adults; consider using low-sodium seasoning or reduced-sodium cheese to lower totals.
- Protein is substantial thanks to the lean ground meat and cheese, making these tacos satisfying and filling.
Why You’ll Love It
This recipe blends speed, flavor, and shared joy. The oven step crisps shells and melts cheese to a perfect, slightly caramelized edge while locking in the savory juices of the meat — delivering mouthfeel and aroma that feel “special” without extra work. These tacos are ideal for social evenings: assemble them on a baking tray, bake, and then let everyone top their own creations. They’re nostalgically comforting yet modern in their convenience, and they scale easily — double the ingredients for a crowd, or make smaller batches for a cozy two-person dinner.
How to Make Oven-Baked Cheesy Tacos (Crispy & Loaded) You’ll Love
Ingredients:
- 1 lb ground beef (or substitute ground turkey or chicken)
- 1 tbsp olive oil
- 1 small onion, diced (about 1/2 cup)
- 2 cloves garlic, minced
- 1 packet taco seasoning (or 2 tbsp homemade taco mix — see substitutions)
- 1/2 cup tomato sauce or salsa
- Salt & pepper, to taste
- 10 small taco shells (flour or corn, slightly warmed)
- 2 cups shredded cheddar cheese (or Mexican blend)
- 1 cup lettuce, shredded
- 1/2 cup diced tomatoes
- 1/2 cup red onion, diced
- 1/4 cup fresh cilantro, chopped
Optional Toppings:
- Sour cream
- Sliced jalapeños
- Guacamole or sliced avocado
- Hot sauce
- Pickled red onions
Substitutions & Options:
- Meat: Use ground turkey or chicken for a leaner option; for vegetarian, substitute 1 lb cooked lentils, crumbled tofu, or a plant-based ground meat alternative.
- Taco seasoning: Mix 1 tsp each chili powder, cumin, paprika; 1/2 tsp each onion powder, garlic powder; pinch of cayenne and salt for a homemade mix.
- Shells: Use corn tortillas for a gluten-free option (ensure brands are certified GF), or crisp small flour tortillas for a softer chew.
- Cheese: Try pepper jack for heat or a dairy-free shredded cheese to make it vegan.
Equipment:
- Skillet (medium)
- 9×13-inch baking dish or similar (lightly greased or lined with foil)
- Oven preheated to 375°F (190°C)
Step-by-step Instructions:
- Preheat the oven to 375°F (190°C). Lightly grease a baking dish or line it with foil for easy cleanup.
- Warm the taco shells slightly (a few seconds in the microwave wrapped in a damp paper towel, or a brief warm-up in a skillet) so they’re pliable and won’t crack when filled.
- In a skillet over medium heat, add 1 tbsp olive oil. Add diced onion and sauté for 3–4 minutes until translucent. Add minced garlic and cook 30–60 seconds until fragrant.
- Add the ground meat to the skillet, break it up with a spoon, and cook until browned and no longer pink (about 6–8 minutes). Drain excess fat if needed (or leave for flavor).
- Stir in taco seasoning and 1/2 cup tomato sauce or salsa. Add salt and pepper to taste. Simmer for 3–5 minutes so flavors meld and the mixture tightens slightly. Remove from heat.
- Stand the warmed shells side-by-side in the prepared baking dish. Fill each shell evenly with the meat mixture (about 2–3 tablespoons per shell, depending on preference).
- Sprinkle each filled shell generously with shredded cheese (2 cups total across 10 shells). Press slightly so cheese coats the top of each taco.
- Bake in the preheated oven for 10–15 minutes, until cheese is fully melted and edges of shells are lightly crisped. Watch closely after 10 minutes to avoid over-browning.
- Remove from the oven. Top with shredded lettuce, diced tomatoes, red onion, and chopped cilantro. Add any optional toppings like sour cream, guacamole, jalapeños, or hot sauce. Serve immediately.
Practical Tips:
- Avoid overfilling shells to keep them upright and prevent sogginess.
- If using corn tortillas, brush lightly with oil and bake 3–5 minutes before filling to help them crisp without breaking.
- For extra crunch, broil 1–2 minutes at the end, watching carefully to prevent burning.
- Taste the meat mixture before filling; adjust seasoning as needed.
Serving Suggestions
- Serve with lime wedges and a side of Mexican rice or cilantro-lime quinoa for a full plate.
- Make a taco bar: place toppings in separate bowls (sour cream, guacamole, salsas, pickled onions, shredded cabbage) and let guests customize.
- For a lighter plate, serve with a crisp green salad or roasted vegetables.
- Turn leftovers into a loaded taco salad — crumble the tacos over mixed greens and drizzle with salsa and a yogurt-lime dressing.
How to Store
- Room Temperature: Assembled and baked tacos should not sit at room temperature for more than 2 hours (follow general food safety guidelines).
- Refrigeration: Store cooled, baked tacos in an airtight container for up to 3–4 days. If possible, store tacos and fresh toppings separately to keep lettuce and tomatoes from wilting.
- Freezer: You can freeze the cooked meat mixture in a freezer-safe container for up to 3 months. Reheat meat from frozen in a skillet over medium heat. Assembled baked tacos don’t freeze well if you want to keep them crispy, but you can freeze individually wrapped shells with meat and cheese for up to 2 months; thaw overnight in the fridge and re-crisp in the oven.
Chef’s Advice
- Balance moisture: Tomato sauce and salsa add great flavor but too much can soften shells — use just enough to coat the meat.
- Cheese distribution: Shred your own cheese when possible; pre-shredded cheese often contains anti-caking agents and can melt slightly differently. Shredded sharp cheddar or a Mexican blend gives the best flavor and melt.
- Temperature cues: Meat is done when no pink remains and juices run clear; cheese is perfect when bubbling and glossy. Use a thermometer if substituting whole cuts — ground meat should reach 160°F (71°C) for beef and 165°F (74°C) for poultry (USDA guidelines).
- Make it ahead: Cook the filling a day ahead; refrigerate and assemble just before baking to save time on the day of serving.
Switch It Up!
- Vegetarian Version: Replace meat with seasoned black beans, cooked lentils, or crumbled and pan-fried extra-firm tofu. Add smoked paprika and a bit of soy sauce for depth.
- Breakfast Twist: Use breakfast sausage or chorizo, add scrambled eggs, and top with pico de gallo for a brunch-ready cheesy taco.
- Lower-Carb Option: Use large lettuce leaves as taco “shells,” or use low-carb tortillas and reduce the cheese to keep macros in check.
- Smoky Chipotle: Stir 1–2 tsp chipotle in adobo into the meat mixture and swap cheddar for smoked Gouda for a deep, smoky profile.
All Your Questions Answered
Q: Can I make these ahead of time and reheat?
A: Make the meat ahead and refrigerate for up to 3 days. Assemble and bake just before serving for best texture. Reheat baked tacos in a 350°F oven for 5–8 minutes until warmed through.
Q: How do I keep shells from getting soggy?
A: Warm shells briefly before filling, and avoid excessive wet ingredients inside before baking. Bake immediately after filling so cheese seals the top and helps protect the shell.
Q: Can I use flour tortillas?
A: Yes — flour tortillas will be softer and chewier. For extra crispness, lightly brush with oil and bake on a tray before filling.
Q: What’s a healthy swap to reduce calories?
A: Use lean ground turkey or chicken, reduce the cheese amount or use a lower-fat cheese, and choose corn tortillas or lettuce wraps to cut carbs and calories.
Q: How do I lower sodium?
A: Use homemade taco seasoning with no added salt, choose reduced-sodium cheese and salsa, and read labels on tortilla packages.
Conclusion
If you’re craving something that’s both cozy and crowd-ready, these oven-baked cheesy tacos deliver on texture, flavor, and simplicity — ideal for weeknights, parties, or anytime you want a joyful meal with minimal fuss. For more inspiration and variations on baked taco techniques, check out this helpful guide from Olive & Mango: Cheesy Baked Tacos | Olive & Mango, or see another crunchy oven-baked approach at Beautiful Eats & Things: Crunchy Oven Baked Beef Tacos – Beautiful Eats & Things.
Try the recipe, make it yours with a twist, and share your photos and tips — I’d love to hear which topping combinations became your new favorite. Enjoy!
Print
Oven-Baked Cheesy Tacos (Crispy & Loaded)
- Total Time: 30 minutes
- Yield: 4 servings 1x
- Diet: Gluten-Free, Dairy-Free option available
Description
Delicious oven-baked tacos filled with spiced meat, topped with melted cheese and fresh vegetables, perfect for any gathering.
Ingredients
- 1 lb ground beef (or substitute ground turkey or chicken)
- 1 tbsp olive oil
- 1 small onion, diced (about 1/2 cup)
- 2 cloves garlic, minced
- 1 packet taco seasoning (or 2 tbsp homemade taco mix)
- 1/2 cup tomato sauce or salsa
- Salt & pepper, to taste
- 10 small taco shells (flour or corn)
- 2 cups shredded cheddar cheese (or Mexican blend)
- 1 cup lettuce, shredded
- 1/2 cup diced tomatoes
- 1/2 cup red onion, diced
- 1/4 cup fresh cilantro, chopped
Instructions
- Preheat the oven to 375°F (190°C). Lightly grease a baking dish or line it with foil.
- Warm the taco shells slightly so they’re pliable and won’t crack when filled.
- In a skillet over medium heat, add olive oil, diced onion, and sauté for 3–4 minutes. Add minced garlic and cook until fragrant.
- Add the ground meat to the skillet, breaking it up, and cook until browned (6–8 minutes). Drain excess fat if needed.
- Stir in taco seasoning and tomato sauce or salsa. Simmer for 3–5 minutes.
- Fill each taco shell with the meat mixture and sprinkle with shredded cheese.
- Bake for 10–15 minutes, until cheese is melted and shells are crisped.
- Top with lettuce, tomatoes, red onion, and cilantro. Serve immediately.
Notes
Feel free to customize toppings and spice levels to your preference. Consider using low-sodium ingredients to reduce salt content.
- Prep Time: 15 minutes
- Cook Time: 15 minutes
- Category: Main Course
- Method: Baking
- Cuisine: Mexican
Nutrition
- Serving Size: 1 serving
- Calories: 635
- Sugar: 4g
- Sodium: 800mg
- Fat: 32g
- Saturated Fat: 12g
- Unsaturated Fat: 16g
- Trans Fat: 0g
- Carbohydrates: 38g
- Fiber: 3g
- Protein: 48g
- Cholesterol: 70mg
Printable Recipe Card
Want just the essential recipe details without scrolling through the article? Get our printable recipe card with just the ingredients and instructions.