A Warm, Crispy Sourdough Bread to Fill Your Home with Comfort
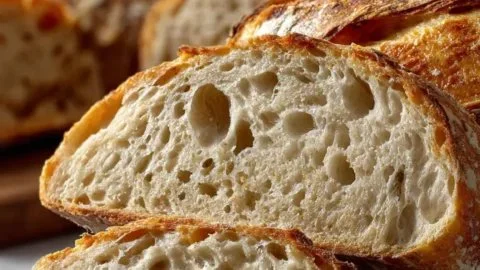
There’s nothing quite like the smell of sourdough baking: a tangy, toasty aroma that curls through the kitchen and promises a crackly, golden crust and an open, chewy crumb. This sourdough loaf greets you with a deep, slightly sour flavor balanced by toasty notes from the long fermentation, and its texture — crisp on the outside, tender and springy inside — begs for butter melting into the nooks of each slice. Baking this loaf is as emotionally satisfying as it is practical: it’s the kind of recipe that turns ordinary mornings into cozy rituals and transforms guests into quietly awed admirers.
Make it for slow weekend breakfasts, as the centerpiece of a rustic dinner spread, or as a homemade gift during the holidays. If you like exploring other comfort breads while you wait for your starter to mature, take a peek at this apple cinnamon bread recipe with warm spices for a sweet, quick alternative to enjoy on those same cozy mornings.
At a Glance
- Prep Time: 45 minutes active (plus bench rests and periodic folding)
- Cook Time: 45 minutes
- Total Time: About 16–24 hours (including bulk ferment, cold proof)
- Servings: 12 slices (1 large loaf)
- Difficulty Level: Intermediate — requires a fed starter and some familiarity with stretch-and-fold technique
Nutrition Highlights
The following nutrition estimates are per serving (1 slice when the loaf is divided into 12 slices). Values are calculated using standard values for all-purpose/bread flour and account for the flour in the active starter (starter assumed 100% hydration). Nutrition data are approximate and based on USDA FoodData Central nutrient averages for all-purpose flour and common baking ingredients.
- Calories: ~182 kcal
- Protein: ~5.2 g
- Carbohydrates: ~38 g
- Fat: ~1.0 g
- Dietary Fiber: ~1.4 g
- Sodium: ~328 mg
Note: These figures are estimates; exact values will vary with the flour type (bread flour has slightly more protein), starter hydration, and final loaf weight. For precise tracking, weigh your finished loaf and calculate nutrition from your specific ingredients using a trusted database such as USDA FoodData Central.
Why You’ll Love It
- Irresistible aroma and texture: The long fermentation gives a complex flavor (mildly tangy and slightly nutty) and a superior crust-to-crumb contrast — perfect for slicing thin for toast or ripping apart warm.
- Ritual and satisfaction: Sourdough baking is a slow, tactile craft. The rhythm of feed, fold, rest, and bake turns a handful of ingredients into something soulful — great for bakers who enjoy process as much as result.
- Versatility: This loaf complements everything — soups, cheeses, eggs, or jam — and toasts beautifully. It’s also naturally preservative-free, so you know exactly what’s in it.
- Health-wise: Natural fermentation partially breaks down starches and may improve digestibility and flavor complexity compared with quick breads. (For medical advice or dietary concerns, consult a healthcare professional.)
Method & Process
Ingredients
- 4 cups (500 g) bread flour or all-purpose flour
- 1⅔ cups (375 g) warm water
- 1 cup (200 g) active sourdough starter (100% hydration)
- 2 teaspoons (10 g) salt
Optional ingredients and substitutions:
- For a nuttier flavor: replace 100 g of the flour with whole wheat or spelt.
- For richer flavor and softer crumb: add 1–2 tablespoons olive oil or melted butter (optional).
- For more open crumb: use 500 g bread flour (higher protein) instead of all-purpose.
- Gluten-free note: This recipe relies on gluten development and is not suitable for direct gluten-free substitution — see variations below for alternatives.
Step-by-step Instructions
- In a large mixing bowl, combine 4 cups of flour and 1⅔ cups of warm water.
- Stir until a shaggy dough forms, then let it rest for 30 minutes. (This autolyse helps gluten develop without kneading.)
- After resting, add 1 cup of active sourdough starter and 2 teaspoons of salt.
- Mix well until everything is fully combined. Use a gentle folding and pressing motion until homogenous; avoid overmixing.
- Cover the bowl with a clean towel or plastic wrap. Let the dough sit at room temperature.
- Every 30 minutes for 2 hours, perform a set of stretch and folds. To stretch and fold, pull one side of the dough upward and fold it over itself. Turn the bowl a quarter turn and repeat three more times.
- After the final fold, cover the bowl again and let the dough rise for 6 to 8 hours. It should double in size and appear bubbly and puffy. (Timing depends on ambient temperature and starter strength.)
- Gently transfer the dough to a lightly floured surface. Shape it into a round or oval loaf by folding and tucking the edges underneath.
- Place the shaped dough seam-side up into a floured proofing basket or towel-lined bowl. Cover and refrigerate for 8 to 12 hours (cold proof).
- The next day, place a Dutch oven into your oven and preheat to 450°F (232°C).
- Remove the dough from the fridge and turn it out onto parchment paper. Score the top of the dough with a sharp knife or razor blade.
- Carefully lower the dough into the hot Dutch oven using the parchment paper. Cover and bake for 20 minutes.
- Remove the lid and bake uncovered for another 25 minutes. The crust should be deeply golden-brown and the internal temperature should read about 205–210°F (96–99°C) when fully baked.
- Take the bread out of the Dutch oven and let it cool completely on a wire rack before slicing.
Practical tips:
- Avoid overhandling the dough after bulk rise to preserve the airy crumb.
- If you don’t have a Dutch oven, bake on a preheated baking stone and use a steam tray to create humidity during the first 15 minutes.
- Check doneness with a thermometer or by thumping the bottom of the loaf — it should sound hollow.
- If your dough doesn’t rise much, your starter may need more frequent feeding; refresh it and repeat.
Presentation Tips
- Slice thick and serve warm with unsalted butter and a sprinkle of flaky sea salt for simple perfection.
- For a light breakfast, toast slices and top with ricotta, honey, and fresh fruit.
- Pair with soups and stews — the crust stands up to dunking and the crumb soaks up broths beautifully.
- For a savory board, serve alongside aged cheeses, olives, and farmhouse pâté. If you want a sweeter counterpart, try this apple cinnamon loaf for a spice-laced contrast.
- Presentation tip: slice with a serrated knife and fan slices on a wooden board, garnished with sprigs of herbs for a rustic look.
Keeping it Fresh
- Room temperature: Store wrapped in a breathable bag (paper or a linen bread bag) for 1–2 days to preserve crust. Avoid plastic if you want to keep the crust crisp.
- Refrigeration: Not recommended for storage longer than 2–3 days — refrigeration accelerates staling by driving moisture crystallization. If you must refrigerate, toast before serving.
- Freezer: Slice the cooled loaf, wrap slices or the whole loaf tightly in plastic wrap and aluminum foil, and freeze for up to 3 months. Reheat from frozen in a 350°F oven for 10–15 minutes (slices) or 25–30 minutes (whole loaf) until warmed through.
Pro Tips & Tricks
- Starter strength: A vigorous, active starter is the backbone of this recipe. Feed your starter 4–12 hours before mixing so it’s at its peak rise when used.
- Hydration and texture: The 75% hydration (375 g water to 500 g flour) in this formula yields an open, soft crumb. Slightly reduce water if you’re new to wet doughs.
- Flour choice: Bread flour increases gluten and gives a more open crumb; all-purpose works well for a slightly denser crumb. For flavor depth, include up to 20% whole grain flour.
- Scoring: Score decisively and quickly to guide the oven spring. Shallow scores will not open as dramatically; too deep and the loaf may collapse.
- Crust color: For a darker, more caramelized crust, leave the loaf in the oven for 3–5 extra minutes uncovered, watching to avoid burning.
Fun Flavor Ideas
- Olive & Rosemary: Fold in 1/2 cup coarsely chopped olives and 1–2 tablespoons chopped fresh rosemary during shaping for a savory, Mediterranean loaf.
- Seeds & Grains: Replace 50 g flour with an equal mix of toasted seeds (sunflower, flax, sesame) and add a tablespoon of honey to balance flavor. Press extra seeds into the loaf surface before baking for visual appeal.
- Cheesy Jalapeño: Add 3/4 cup grated sharp cheddar and 1–2 diced jalapeños for a spicy, melty loaf — fold them in gently at shaping to distribute evenly.
- Vegan adaptation: The base recipe is inherently vegan (no dairy or eggs) when you omit optional butter/oil; use plant-based spreads when serving.
- Gluten-free alternative: For a gluten-free sourdough, use a dedicated gluten-free starter and a flour blend formulated for bread (note: technique and hydration will differ significantly).
Frequently Asked Questions
Q: Can I speed this up for a same-day loaf?
A: You can bulk-ferment in a warmer place to shorten the timeline, but you’ll sacrifice some flavor complexity. A same-day loaf often uses less cold-proof time; expect a slightly less tangy profile.
Q: My crumb is dense — what went wrong?
A: Likely underproofed or insufficient gluten development. Ensure you gave the dough enough stretch-and-fold cycles, and that the bulk rise produced visible bubbles before shaping.
Q: How can I tell when the dough is properly proofed after the fridge?
A: Do a gentle finger poke test: a slow spring-back that leaves a slight indentation indicates readiness. If it springs back completely, it needs more proofing; if it collapses, it’s overproofed.
Q: Is sourdough healthier than commercial yeast bread?
A: Sourdough fermentation may increase bioavailability of some nutrients and can be easier to digest for some people, but overall calories and macronutrients are similar to regular bread. For health questions, consult a dietitian.
Q: Can I use whole wheat flour?
A: Yes — replace up to 20–30% of the white flour with whole wheat initially to maintain dough structure. Higher percentages require more water and gentle handling.
Conclusion
Baking sourdough is part science, part art — it rewards patience with a loaf that’s flavorful, textured, and deeply satisfying. Try this recipe over a relaxed weekend and share the results with friends or family; once you get comfortable with the rhythm of feeding, folding, and watching the dough bloom, you’ll be hooked. For a clear visual primer and helpful beginner tips, see this guide on sourdough basics at Sourdough Bread: A Beginner’s Guide, and for another approachable, step-by-step tutorial that demystifies artisan sourdough baking, check out Homemade Sourdough Bread, Step by Step.
If you try this loaf, I’d love to hear how it turned out — share a photo or a tip you discovered along the way and join the conversation with other home bakers. Happy baking!
Printable Recipe Card
Want just the essential recipe details without scrolling through the article? Get our printable recipe card with just the ingredients and instructions.