Dish Snapshot
Introduction
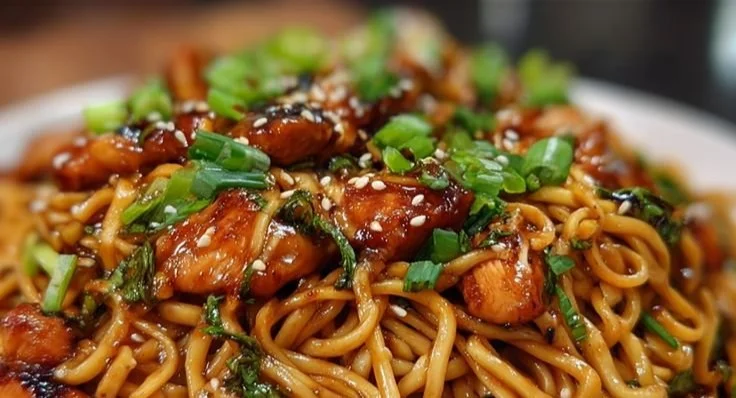
There’s something magnetic about a pan of sticky garlic chicken noodles: the steam rising with the heady scent of toasted sesame and caramelized honey, the first forkful combining glossy, chewy noodles with tender ribbons of golden chicken, and the warm hit of garlic that lingers long after the plate is empty. This recipe hits multiple sensory notes — sweet, savory, and umami — while offering contrast in texture: slippery noodles, slightly crisp seared edges on the chicken, and a finishing snap from sliced green onion.
It’s the kind of dish that comforts on rainy weeknights, performs beautifully for casual dinner guests, and scales easily for meal prep. If you like sticky noodle bowls but want something quicker than takeout, this is your new go-to. For a sibling-style noodle dinner with a different protein profile, try the sticky-sauce beef stir-fry noodles I adapted recently — it’s a great companion idea for batch-cooking nights.
Dish Snapshot
- Prep Time: 10 minutes
- Cook Time: 12 minutes
- Total Time: 22 minutes
- Servings: 2 generous servings (adjust as needed)
- Difficulty Level: Easy — weeknight-friendly
Nutrition Highlights
Estimated nutrition per serving (calculated using ingredient-level estimates based on USDA FoodData Central values and cross-checked with general guidance from public health sources such as the CDC and Mayo Clinic):
- Calories: ~750 kcal
- Protein: ~52 g
- Carbohydrates: ~95 g
- Fat: ~16 g
- Saturated Fat: ~2.5 g (approx.)
- Fiber: ~3 g
- Sugars: ~19 g
- Sodium: ~1,850 mg
Notes on these estimates:
- These values are approximate and based on the ingredient quantities listed in the recipe (200 g dry noodles, 250 g cooked-equivalent chicken breast, 2 tbsp honey, 1/4 cup soy sauce, etc.), using USDA FoodData Central reference values for each ingredient. If you need precise tracking (for medical diets or strict macros), enter your exact brands and cooked weights into a nutrition calculator or app tied to a verified database.
- Sodium is fairly high here because of the quarter-cup of soy sauce; the CDC recommends limiting sodium to about 2,300 mg per day for most adults, so consider lower-sodium soy sauce or diluting with water if you’re monitoring salt intake.
Why You’ll Love It
This recipe combines three compelling reasons to make it now:
- Flavor & Aroma: The sticky-sweet glaze from honey and soy creates a glossy coat that clings to each noodle, while garlic and sesame oil add depth and warmth.
- Speed & Ease: Ready in about 20–25 minutes from start to finish, it’s perfect for busy weeknights when you want something satisfying without fuss.
- Crowd-pleaser Quality: It’s familiar enough for family members who prefer comfort food, but the balanced sweet-salty profile also makes it a hit with friends. Plus, it’s a great base for variations — add greens, swap proteins, or make it spicy.
Step-by-Step Instructions
Ingredients
- 200 g noodles (dry weight; use egg noodles, lo mein, or your favorite wheat noodles)
- 250 g chicken breast, sliced thinly
- 3 cloves garlic, minced
- 1/4 cup soy sauce
- 2 tablespoons honey
- 1 tablespoon vegetable oil
- 1 teaspoon sesame oil
- 1 green onion, sliced
- Salt and pepper to taste
Optional ingredients and substitutions:
- Use low-sodium soy sauce to reduce sodium (substitute 1:1).
- Swap honey for maple syrup or brown sugar (for a less floral sweetness).
- Replace chicken with tofu or tempeh for a vegetarian version (see variations).
- For a gluten-free version, use rice noodles and tamari (see variations).
- Add vegetables such as snap peas, shredded carrot, or bok choy for color and fiber.
Instructions
- Cook the noodles according to package instructions and set aside. Drain well and toss lightly with a few drops of vegetable oil if you want to prevent sticking.
- In a large skillet, heat vegetable oil over medium heat until shimmering.
- Add the sliced chicken and season with salt and pepper. Cook until browned and cooked through, about 4–6 minutes depending on thickness.
- Stir in the minced garlic and cook for an additional minute, just until fragrant (avoid browning it too deeply or it will taste bitter).
- In a small bowl, mix the soy sauce and honey together, then pour over the chicken.
- Add the cooked noodles to the skillet and toss everything together until well combined and the sauce coats the noodles evenly.
- Drizzle with sesame oil and garnish with sliced green onions before serving.
Practical tips:
- Avoid overmixing after adding the sauce — toss gently so the noodles don’t break and the chicken stays in pieces.
- If the sauce seems too thick, splash in 1–2 tablespoons of hot water or stock to loosen and help it distribute.
- Check chicken doneness by cutting an edge to ensure no pink remains; internal temperature should reach 165°F (74°C).
- For more caramelization on the chicken, sear in a hotter pan for the first minute, then lower the heat to finish cooking.
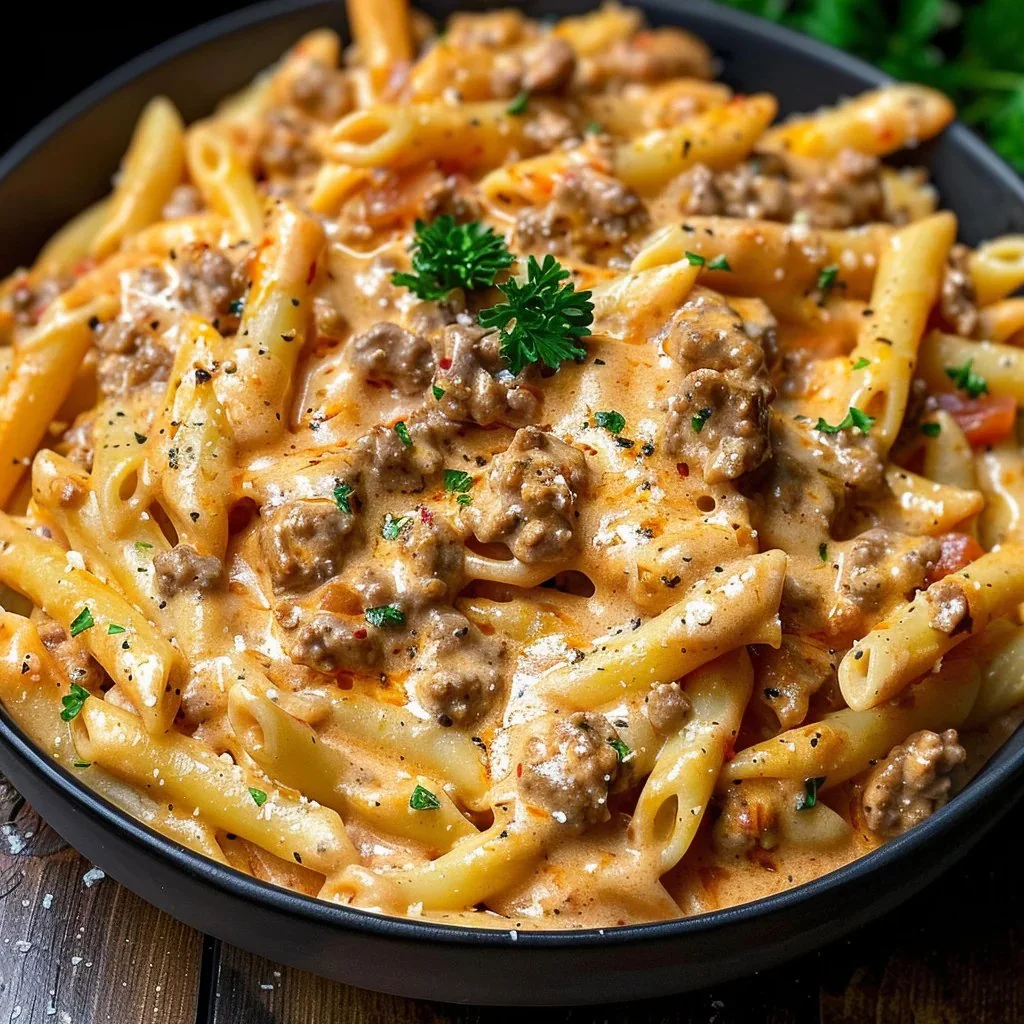
While you’re here, you might enjoy a creamy, savory twist on garlic-and-cheese chicken in this skillet recipe: Cheesy Cajun Garlic Chicken Rotini Skillet — it’s a different vibe but shares that same comforting garlic backbone.
Best Pairings
- Simple sides: A bright cucumber salad or quick pickled vegetables cut through the glaze and refresh the palate.
- Vegetables: Stir-fried bok choy, sautéed snow peas, or steamed broccoli add color and nutrition.
- Drinks: Green tea or a light lager complements the dish without overpowering its sweet-salty flavors. For a non-alcoholic option, a citrusy iced tea pairs nicely.
- Presentation tip: Pile noodles in a shallow bowl and finish with extra sliced green onion and a wedge of lime for a fresh lift.
Storage Instructions
- Room temperature: Do not leave cooked sticky garlic chicken noodles at room temperature for more than 2 hours (or 1 hour if ambient temperatures are above 90°F / 32°C). Bacteria grow rapidly outside safe temperature ranges.
- Refrigeration: Store in an airtight container for up to 3–4 days. Reheat gently on the stovetop over medium-low heat with a splash of water to refresh the sauce, or microwave in 30-second bursts, stirring between intervals.
- Freezer: You can freeze portions for up to 2 months. Thaw overnight in the refrigerator and reheat thoroughly before serving. Note that noodle texture may soften slightly after freezing; if texture is critical, freeze the cooked chicken separately from noodles.
Pro Tips & Tricks
- Best noodle types: Thick lo mein or egg noodles hold the sauce well; thin spaghetti also works in a pinch but will be less luxurious.
- Browning is flavor: Let the chicken get a nice golden crust before stirring; that caramelization adds depth to the sauce.
- Balance sweetness: If your honey is very floral, reduce it by 1/2 tablespoon and add a splash of rice vinegar for brightness.
- Heat management: Cook garlic on medium to avoid bitter, burnt garlic — you want it fragrant, not charred.
- Texture cue: Noodles should be al dente (slightly firm) because they will continue to soften when tossed with sauce.
Fun Flavor Ideas
- Vegan Sticky Garlic Noodles: Replace chicken with firm tofu (press, cube, and pan-fry) and swap honey for maple syrup; use tamari for gluten-free soy flavor.
- Spicy Peanut Twist: Add 2 tablespoons of smooth peanut butter and 1 teaspoon chili paste to the soy-honey mix for a nutty, spicy glaze. Garnish with chopped peanuts and cilantro.
- Citrus-Sesame Upgrade: Stir in 1 tablespoon fresh lime juice and 1 teaspoon grated ginger to the sauce for a brighter, zesty finish; finish with toasted sesame seeds.
- Veg-Forward: Add quick-sautéed mushrooms and baby spinach in step 4 for extra umami and greens.
Frequently Asked Questions
Q: Can I use pre-cooked or rotisserie chicken?
A: Yes — reduce initial cooking time. Add shredded pre-cooked chicken in step 5 so it warms through and absorbs the sauce without drying out.
Q: My noodles clump after cooking. How do I fix it?
A: Rinse briefly with hot water and toss with a teaspoon of oil right after draining. When tossing in the skillet, use tongs to separate and coat evenly.
Q: How can I reduce the sodium?
A: Use low-sodium soy sauce (or dilute with a splash of water) and taste before adding extra salt. You can also add a splash of citrus to boost flavor without salt.
Q: Will freezing change the texture?
A: Yes — frozen then reheated noodles can be softer. To minimize change, undercook noodles slightly before freezing and separate protein from noodles if you can.
Conclusion
If you’re craving a quick, satisfying bowl that checks the boxes for flavor, speed, and comfort, these sticky garlic chicken noodles are a winner — and they’re easy to adapt for dietary needs or to stretch into extra servings. Try them tonight, and if you enjoyed the honey-soy glaze, you might like this bright, garlicky take on crispy noodles from a fellow food writer at Half Baked Harvest: 20 minute Crispy Garlic Chicken Noodles. For an Instant Pot spin that swaps in peanut flavor and pressure-cooker convenience, check out this creative recipe: Instant Pot Sticky Garlic Peanut Noodles with Chicken.
I’d love to hear how your version turns out — share your photos or tweaks in the comments, and join the community here for more easy, flavor-forward recipes.
Printable Recipe Card
Want just the essential recipe details without scrolling through the article? Get our printable recipe card with just the ingredients and instructions.