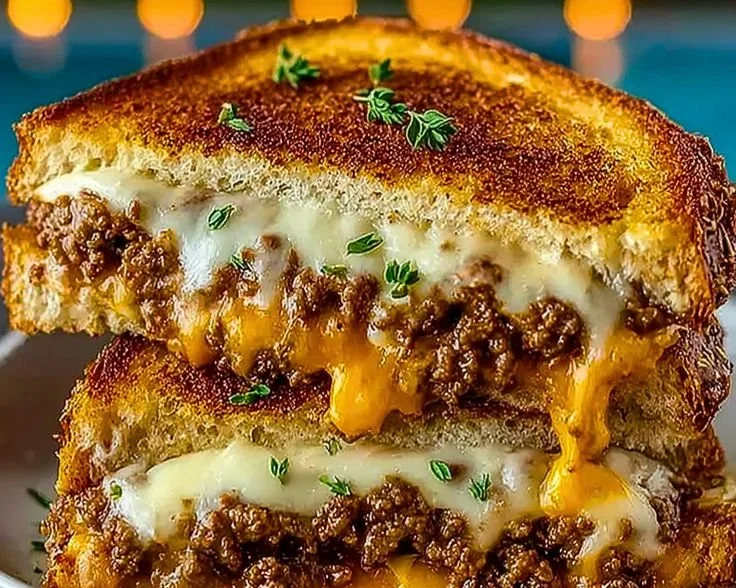
Ultimate Cheesy Ground Beef Melt
Introduction
The sizzle of ground beef hitting a hot skillet, the sweet-soft whisper of caramelized onions, and the golden, gooey pull of melted cheese between toasted bread — this sandwich is a comfort-food symphony. One bite delivers savory beef, silky cheese, and a toasty crunch that warms hands and hearts. It’s the kind of recipe that smells like home: browned meat, buttery toast, and a hint of garlic that invites everyone to the table.
Whether you need a fast weeknight dinner, a cozy weekend brunch, or a hearty snack for game day, the Ultimate Cheesy Ground Beef Melt fits the bill. It’s quick enough for busy evenings, substantial enough for hungry teenagers, and nostalgic enough to bring people together. If you’re exploring other hearty ground-beef ideas, take a look at this similar casserole for meal-prep inspiration: cheesy ground beef and rice casserole.
Dish Snapshot
- Prep Time: 10 minutes
- Cook Time: 12–15 minutes
- Total Time: 25 minutes
- Servings: 2 generous sandwiches (serves 2)
- Difficulty Level: Easy — great for beginner cooks and busy hosts
Nutrition Highlights
Estimated nutrition per serving (one sandwich). Values are approximations based on ingredient quantities and USDA FoodData Central entries; refer to your labels and sources like the USDA or Mayo Clinic for precise needs.
- Calories: ~1,065 kcal
- Protein: ~78 g
- Carbohydrates: ~31 g
- Total Fat: ~71 g
- Saturated Fat: ~31 g
- Sodium: variable (depends on added salt and bread)
- Fiber: ~2–3 g
Notes: This melt is calorie- and fat-dense because of the beef, cheese, and butter. To compare against daily recommendations, the Mayo Clinic suggests typical calorie needs vary by age/sex/activity; consider lighter swaps if you’re reducing calories or saturated fat.
Why You’ll Love It
- Irresistible combination: The toasty bread + melted cheese + savory beef creates a layered texture contrast — crunchy exterior, juicy filling, and stringy cheese.
- Fast comfort: From fridge-to-table in about 25 minutes, it’s perfect for nights when you want something satisfying without fuss.
- Crowd-pleaser: Feed family members of all ages or assemble a platter for casual gatherings — this sandwich evokes familiarity and joy.
- Flexible: Swap cheeses, breads, or spices to match seasonal produce or dietary needs.
Preparation Guide
Ingredients
- 1 pound (454 g) ground beef (85% lean recommended)
- 1 medium onion, chopped (about 1 cup)
- 2 cloves garlic, minced
- 1 cup shredded cheddar cheese (about 113 g) — or cheese of choice
- 4 slices bread (your choice: sourdough, rye, whole-wheat, or gluten-free)
- Salt and pepper to taste
- Butter for toasting (about 1–2 tablespoons total)
Optional ingredients and substitutions
- Swap ground turkey or chicken for a leaner sandwich.
- Use Swiss, provolone, or pepper jack instead of cheddar for different flavor profiles.
- For a lower-fat version: use 90–95% lean ground beef and a reduced-fat cheese.
- Make it gluten-free with certified gluten-free bread.
- Add sliced pickles or caramelized onions for extra depth.
Method (step-by-step)
- In a skillet over medium heat, cook the ground beef, chopped onion, and minced garlic until the beef is browned and the onion is soft. Season with salt and pepper. Break the beef into small pieces as it cooks so it combines evenly.
- Place one slice of bread in the skillet (or use a clean pan set to low-medium; you can assemble in the pan or in a separate skillet), add a layer of the beef mixture evenly across the slice, top with shredded cheese, and cover with another slice of bread. Repeat for second sandwich.
- Butter the outside of each sandwich lightly (butter side out) and cook in the skillet over medium-low heat until the outside is golden brown, then flip and cook the other side until the bread is toasted and the cheese is melted. Press slightly with a spatula to help the cheese melt and the sandwich adhere.
- Remove from skillet, slice diagonally, and serve warm.
Practical tips
- Don’t rush the toasting: medium-low heat gives time for cheese to melt without burning bread.
- If cheese hasn’t fully melted after toasting both sides, cover the pan for a minute to trap heat.
- Avoid overmixing the beef after seasoning to keep texture tender.
- For even browning, use a heavy skillet (cast iron is ideal).
For another cheesy ground-beef twist that’s oven-ready, see this comforting casserole idea: cheesy ground beef and rice casserole variations.
Serve It Up
- Classic: Serve the melt hot with a dill pickle or sliced pickles on the side and kettle chips.
- Lighter pairing: A crisp green salad with vinaigrette cuts richness and adds freshness.
- Brunch-style: Pair with scrambled eggs and coffee or a savory tomato soup for dipping.
- Snack/party: Cut into smaller halves or triangles and arrange on a platter with mustard or a roasted red pepper dip for dipping.
Keeping it Fresh
- Room temperature: Not recommended to leave out for more than 2 hours (per USDA food-safety guidance).
- Refrigeration: Store cooled sandwiches in an airtight container or wrapped in foil for 3–4 days. Reheat in a skillet or oven until warmed through.
- Freezer: Wrap sandwiches individually in plastic wrap and place in a freezer-safe container for up to 1–2 months. Thaw in the refrigerator overnight and re-crisp in a skillet or toaster oven.
- Reheating tip: To restore crunch, reheat in a skillet over medium heat or in a 375°F (190°C) oven for 8–10 minutes rather than microwaving.
Chef’s Advice
- Cheese selection matters: firmer, meltable cheeses like cheddar, provolone, or gruyère give the best pull and flavor.
- Toasting temperature: medium-low heat prevents burned bread with unmelted cheese. Patience yields a uniform melt.
- Texture balance: finely crumble the cooked beef so it layers evenly; large chunks can make sandwiches fall apart.
- Season thoughtfully: a pinch of smoked paprika or a dash of Worcestershire sauce in the beef elevates the savory profile without adding extra steps.
Fun Flavor Ideas
- Spicy Southwest Melt: Stir in a tablespoon of taco seasoning, use pepper jack cheese, and top with sliced avocado and pickled jalapeños.
- Mediterranean Twist: Replace cheddar with feta + provolone, add chopped sun-dried tomatoes and a smear of tzatziki.
- Veggie-forward / Lighter: Use lean ground turkey, swap to whole-wheat bread, and add fresh spinach and tomato slices.
- Vegan option: Replace beef with crumbled seasoned tempeh or a plant-based ground beef alternative, swap butter for vegan spread, and use vegan cheese on gluten-free bread.
Recipe Q&A
Q: Can I make this ahead of time?
A: Assemble the beef mixture and store separately in the fridge for up to 3 days; toast just before serving for best texture.
Q: What if my cheese won’t melt?
A: Reduce heat and cover the pan for 1–2 minutes to trap steam; grating cheese thinly melts faster than thick slices.
Q: How can I reduce calories or saturated fat?
A: Use 90–95% lean ground beef or ground turkey, choose reduced-fat cheese, and limit butter to a light spray or brush.
Q: Can I freeze assembled sandwiches uncooked?
A: Yes — wrap tightly and freeze up to 1–2 months. Cook from frozen at a slightly lower heat, covered, until heated through.
Conclusion
If you want a homey, indulgent sandwich that comes together quickly and satisfies a crowd, the Ultimate Cheesy Ground Beef Melt delivers every time. Try the classic approach first, then experiment with the variations above to make it your own. For a quick skillet-friendly patty-melt take, check this reader-friendly version: Easy Cheesy Patty Melt – Simply Delicious Food. For a deeper, technique-focused take on the classic patty melt, this comprehensive guide offers thoughtful tips: The Best Patty Melt Recipe – Serious Eats.
Enjoy the warm melt, and please share your photos or tweaks — I love hearing how you make this recipe your own.