Ultimate Cheesy Ground Beef Melt
Introduction
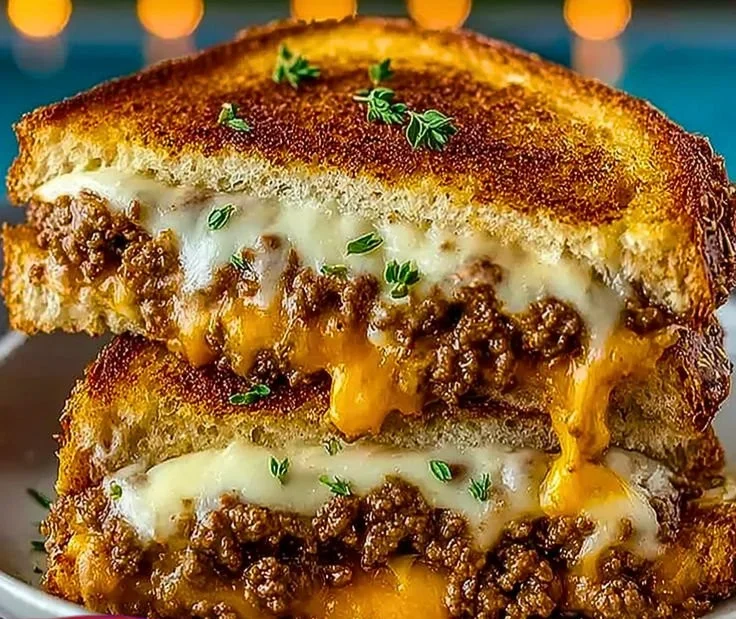
The first bite of this Ultimate Cheesy Ground Beef Melt is pure comfort: warm, buttery bread giving way to a savory, peppery ground beef filling and pools of molten cheddar that stretch like a slow-motion indulgence. The aroma—sauteed onions and bell pepper mingling with Worcestershire’s tang—wraps the kitchen in a cozy hug before you even lift the sandwich to your mouth. The contrast of crispy, golden crust and the juicy, slightly textured beef-cheese center hits every satisfying note: crunchy, creamy, savory, and unmistakably nostalgic.
This sandwich is perfect for busy weeknights when you need something fast and filling, for lazy weekend brunches, or as a crowd-pleasing snack at a casual gathering. If you enjoy layered, cheesy ground-beef dishes, try this alongside a baked casserole like this cheesy ground beef and rice casserole (version 2) for a full, comforting menu.
At a Glance
- Prep Time: 10 minutes
- Cook Time: 15–20 minutes
- Total Time: 25–30 minutes
- Servings: 2 (makes 2 large melts)
- Difficulty Level: Easy / Weeknight-friendly
Nutrition Highlights
Nutrition per serving (estimate; recipe yields 2 servings)
- Calories: ~1,095 kcal
- Protein: ~60 g
- Carbohydrates: ~36 g
- Fat: ~77 g
- Fiber: ~4 g
- Sodium: variable (moderate to high depending on cheese, bread, and Worcestershire)
Notes on these numbers:
These are estimates calculated using standard ingredient values from government nutrition databases (USDA FoodData Central) and reviewed against general guidance from reputable sources (Mayo Clinic) for portioning and macronutrient reference. Exact values will vary with your choice of beef (lean vs. fatty), cheese type, bread, and how much butter you use. For lighter options, choose lean ground beef, reduced-fat cheese, and whole-grain bread.
Why You’ll Love It
This sandwich wins on multiple fronts:
- Flavor & Aroma: The Worcestershire sauce adds a deep, savory umami lift that makes the beef irresistible; melted cheddar delivers creamy, tangy comfort.
- Texture Play: Crispy, buttery bread contrasts the soft, melty center — a satisfying mouthfeel in every bite.
- Family & Gathering Friendly: It’s simple enough for weeknights and familiar enough to please picky eaters; double or triple the recipe for a crowd.
- Speed & Ease: From fridge to table in about 30 minutes—ideal when time is short but cravings are large.
How to Make Ultimate Cheesy Ground Beef Melt
Ingredients
- 1 pound ground beef
- 1 cup shredded cheese (cheddar or your choice)
- 1 onion, diced
- 1 bell pepper, diced
- 2 tablespoons Worcestershire sauce
- Salt and pepper to taste
- 4 slices of bread
- Butter for toasting
Optional ingredients and substitutions:
- Swap cheddar for pepper jack, Swiss, or a blend for different flavor profiles.
- Use lean ground beef (90/10) to reduce fat and calories.
- For a lighter option, use olive oil spray instead of butter to toast bread, or use whole-grain bread for added fiber.
- Add a dash of smoked paprika or a teaspoon of Dijon mustard to the beef for a smoky or tangy note.
If you enjoy ground-beef comfort food in other formats, check out another casserole spin on the idea here: cheesy ground beef and rice casserole (version 3).
Method — Step-by-step
- In a skillet, cook the ground beef over medium heat until browned. Drain any excess fat.
- Add the diced onion and bell pepper to the skillet and cook until softened, about 4–5 minutes.
- Stir in the Worcestershire sauce, salt, and pepper. Remove from heat.
- Preheat another skillet or griddle over medium heat.
- Butter one side of each slice of bread, then place two slices butter-side down on the skillet.
- Spoon the beef mixture onto each slice, adding a generous amount of cheese on top.
- Place the remaining slices of bread on top, butter-side up.
- Cook until the bottom is golden and crispy, about 3–4 minutes.
- Flip the sandwiches carefully and cook the other side until golden and the cheese is melted, about 3–4 more minutes.
- Slice in half and serve warm.
Practical tips:
- Avoid overmixing the beef while browning; gentle stirring preserves texture.
- If your skillet gets crowded, brown the beef in batches for even cooking.
- Use a lid briefly after flipping to speed cheese melting without overcooking bread.
- Check doneness by ensuring bread is golden and internal temperature of beef reaches 160°F (71°C) if using higher-fat fresh ground beef; use an instant-read thermometer for certainty.
Best Pairings
- Classic sides: dill pickles, coleslaw, or a crisp green salad to cut richness.
- Comfort combo: serve with kettle chips or seasoned fries for a diner-style plate.
- Beverage: a robust iced tea, a cold beer, or a lightly roasted coffee for brunch.
- Lighter pairing: a lemony arugula salad balances the sandwich’s richness beautifully.
Keeping it Fresh
- Room temperature: Eat within 2 hours if left out; do not keep at room temperature longer for safety.
- Refrigerator: Store cooled leftovers in an airtight container for up to 3–4 days. Reheat gently in a skillet or oven to restore crispness and melt the cheese.
- Freezer: Fully assembled sandwiches are best frozen without condiments; wrap tightly and freeze for up to 1 month. Thaw overnight in the fridge and reheat in an oven or skillet.
Chef’s Advice
- Best ground beef: For maximum flavor, a beef blend around 80/20 gives juiciness and mouthfeel; for lower fat, 90/10 still works and reduces draining.
- Cheese choices: Sharp cheddar gives assertive flavor; Swiss delivers an elegant nuttiness; pepper jack adds heat. Use freshly shredded cheese for better melt and texture (pre-shredded often contains anti-caking agents that affect melt).
- Bread selection: Dense country bread or sourdough holds up to filling; very thin sandwich bread can get soggy.
- Doneness cues: Look for a golden crust and a bubbling seam of cheese at the edges—these are your signals the sandwich is ready.
Fun Flavor Ideas
- Mexican-style: Add a teaspoon chili powder and use pepper jack cheese; top with sliced avocado and a squeeze of lime.
- Mushroom & onion: Sauté sliced mushrooms with the onions for a deeper, savory layer; swap cheddar for Swiss.
- Vegetarian take: Replace ground beef with cooked and seasoned textured vegetable protein (TVP) or crumbled tempeh; use vegan cheese to make it fully plant-based.
- Gluten-free: Use gluten-free bread and gluten-free Worcestershire sauce (some contain anchovies/soy/wheat—check labels).
All Your Questions Answered
Q: Can I make this ahead of time?
A: You can cook the beef mixture ahead and refrigerate for up to 3 days; assemble and toast just before serving for best texture.
Q: How do I prevent soggy bread?
A: Use a hot skillet and butter the bread well, cooking long enough for a golden crust. Press lightly with a spatula and avoid overstuffing.
Q: What’s the healthiest swap?
A: Use lean ground beef, reduced-fat cheese, whole-grain bread, and olive oil spray instead of butter to lower fat and calories.
Q: Can I freeze the cooked beef mixture?
A: Yes—cool completely and freeze in an airtight container for up to 3 months. Thaw overnight before reheating.
Conclusion
If you try this Ultimate Cheesy Ground Beef Melt, share your twists and photos—there’s nothing better than community-tested comfort food. For another quick, approachable patty-melt style recipe, see the helpful walkthrough at Easy Cheesy Patty Melt – Simply Delicious Food, and for a deep dive into technique and the classic patty melt build, consult The Best Patty Melt Recipe – Serious Eats. Enjoy the golden crunch and gooey center—and come back to tell us how you customized yours!